


Most Recent Posts
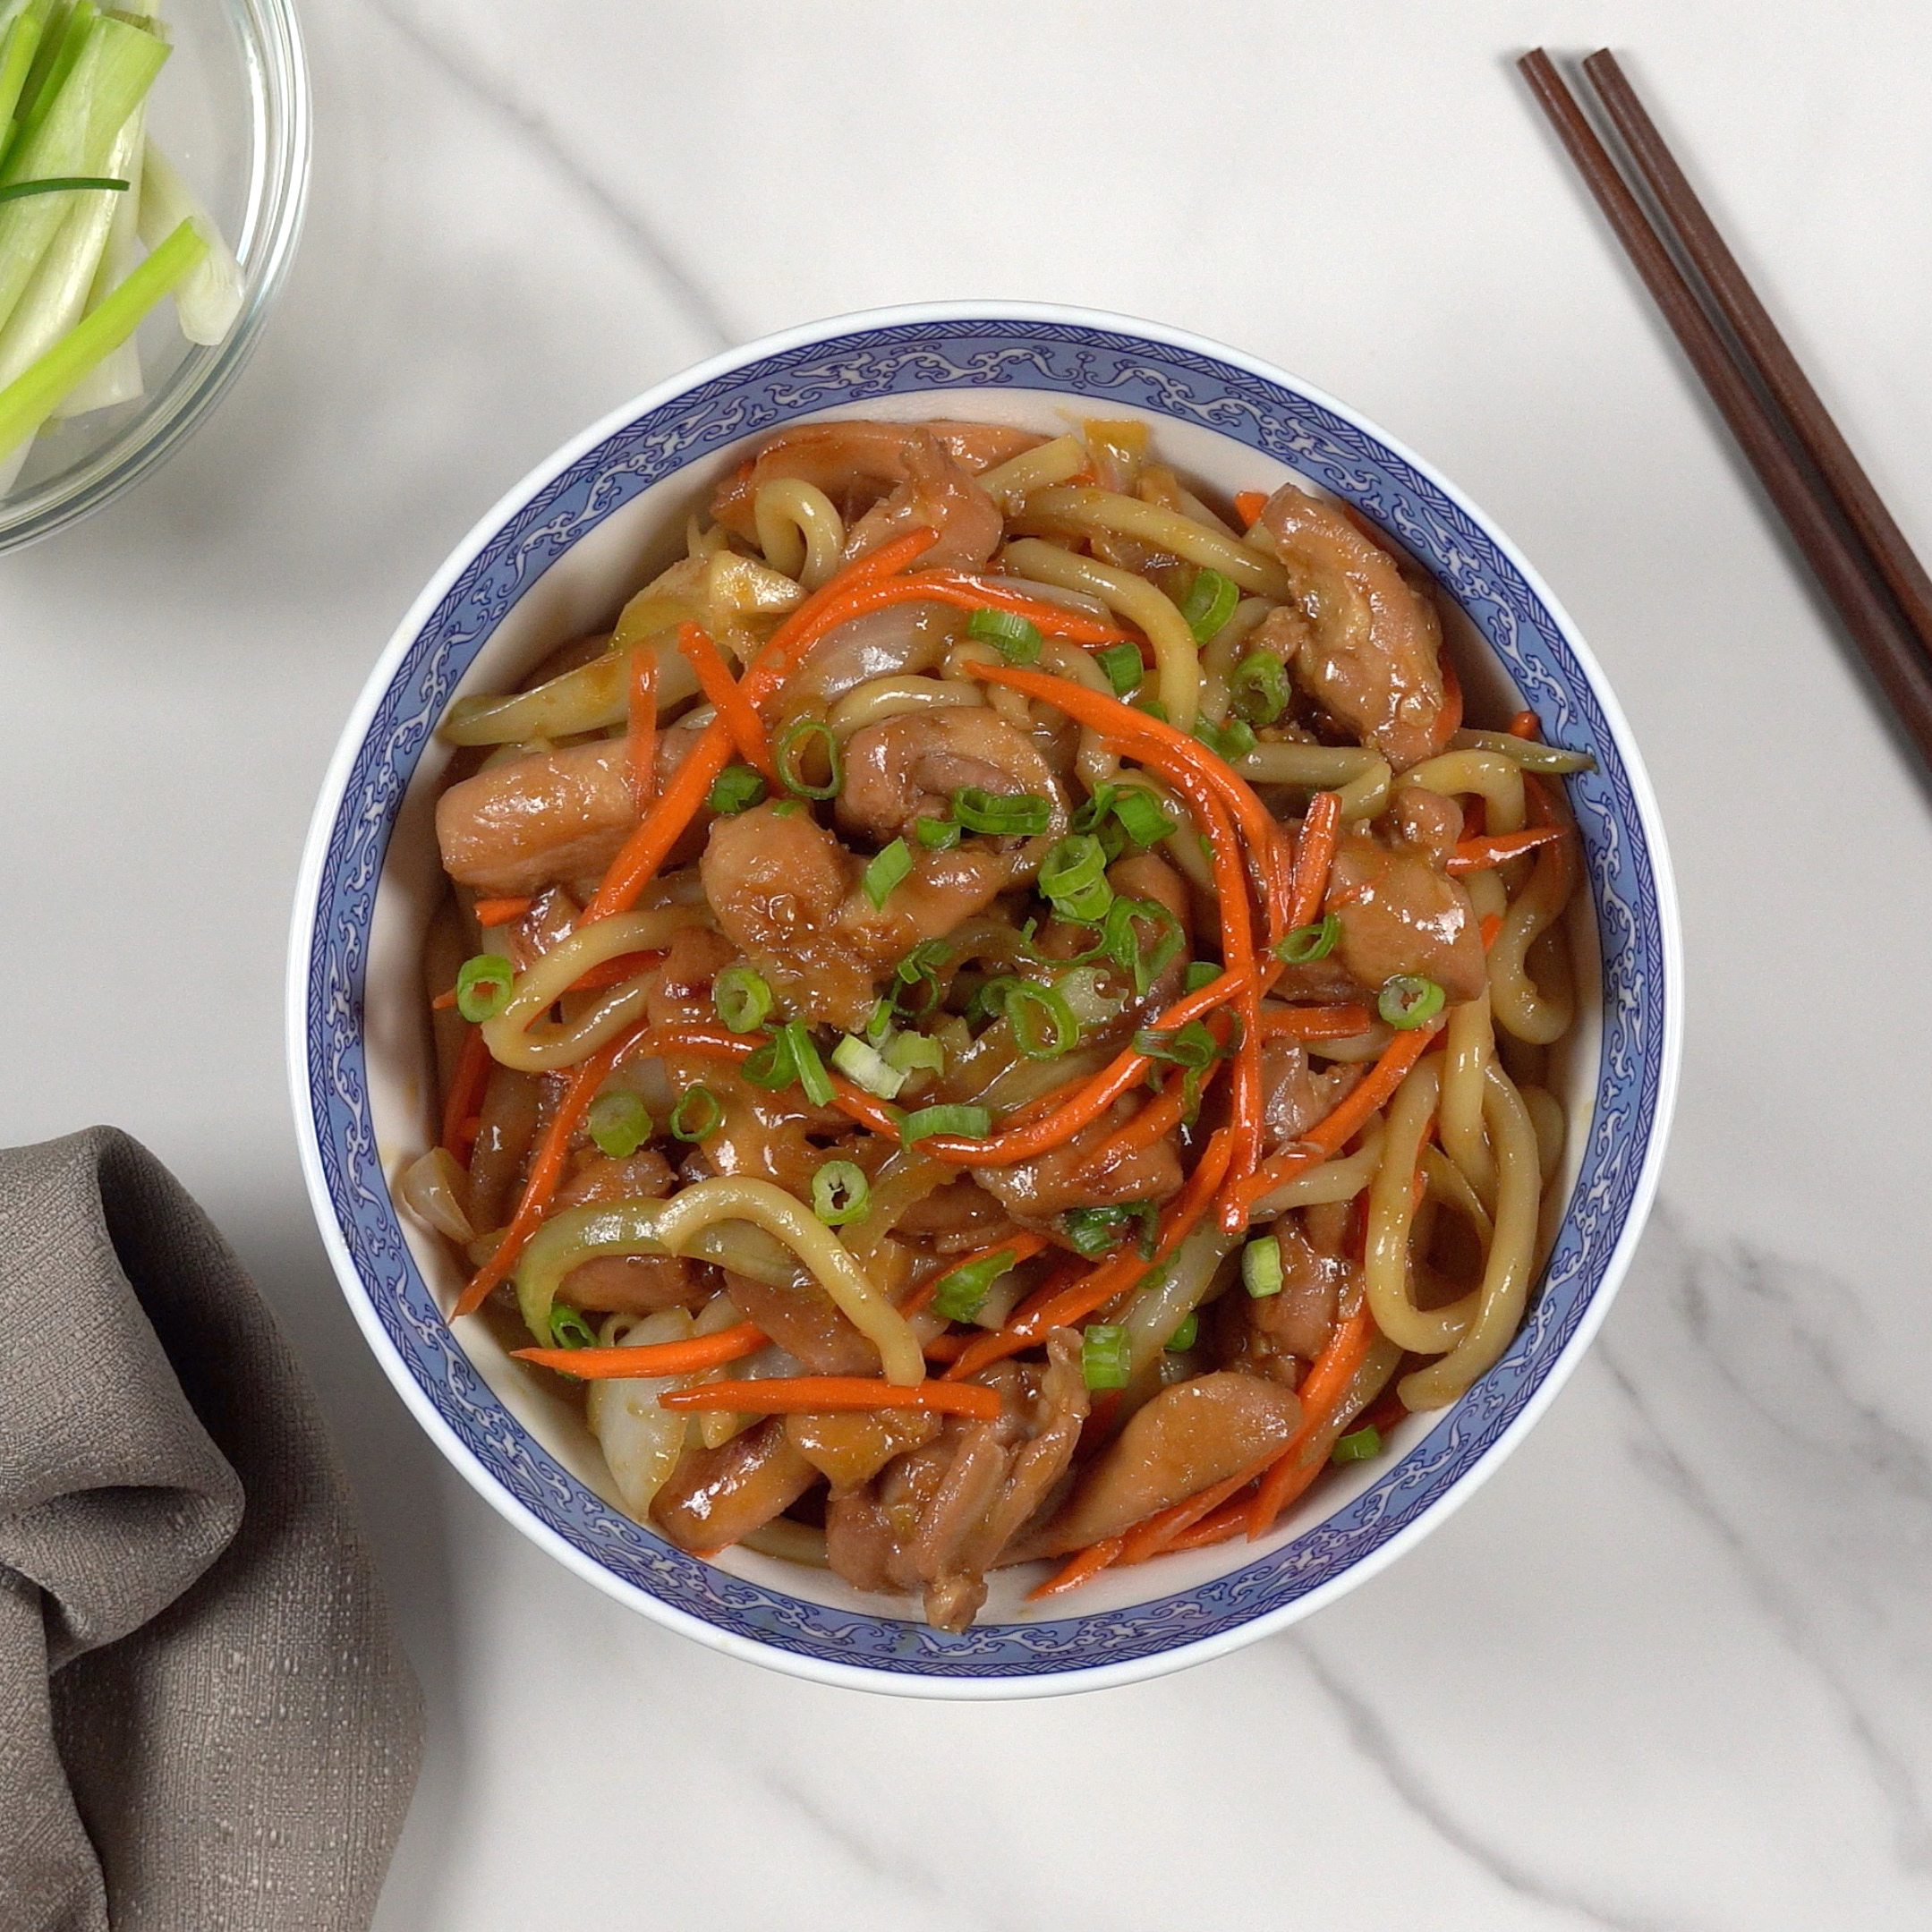
Teriyaki Chicken Udon Noodles
Teriyaki Chicken Udon Noodles are sweet ,deliciously tasty, and good to the last bite. Chicken & udon noodles are a simple and easy to make selection that is perfect on any occasion. Full of flavor, textures and at a budget price, this is perfect normal meal planning. Quick and tasty this recipe will drive everyone in the house to the table at neck break speed. I enjoyed this recipe and recommend you try it at least once to see for yourself how delicious it really is. You can replace any protein of your liking to this dish.
It’s one of my personal favorite things to make for a quick and easy meal is this Udon Noodles recipe. I have eaten these noodles like these for most of my life; being brought up in a home where noodles and rice are a main staple for the table. If you look in my cabinets you will find a box of these noodles from the local grocery. The chew of a udon noodles is an elegant experience that heightens the sophistication of a simple work with what you got meal. I generally have the majority of these ingredients on hand or only need to grab one or two things at the store to complete the meal. This is also simple to warm up later and keeps great under refrigeration. A couple of microwaveable dishes in the fridge for a pop and go reheat meal at home or in the office.
These noodles sit easy on the stomach but are filling at the same time. Thick delicious sauce coated noodles that burst with smooth natural flavors and are as versatile as your preferences on any given day. They basically will go well with any kinda of vegetable you got in the house.
Watch the video and follow the instructions below to have tender and juicy Teriyaki Udon Chicken Noodles today. Like and share this or any of my recipes you find interesting from my growing catalogue of menu selections. Don’t forget to hit the subscribe button to stay up to date on all the latest eatfoodlicious publications. Succulent and savory teriyaki chicken is perfect when served on a warm bed of Jasmine rice. Thanks for visiting and see you again soon.
Please follow Facebook, Instagram, Twitter , Pinterest, or subscribe to my YouTube channel.

In a pot, boil some water. Cook the noodles until they loosen. Drain and set aside.

Cut the chicken into cubes. Heat the wok/skillet to medium-high. Add oil and wait for 30 seconds. Add chicken.

Add 6 tbsp teriyaki sauce, diced garlic, grated ginger and mix everything together.

Cook for 6-8 minutes.

Once, the glaze has nearly evaporated, add sliced onions and cook for another 2-3 minutes.

Add noodles and 2 tbsp teriyaki sauce. Mix the sauce with the noodles. Turn up the heat to high.

Add carrots and mix everything together. Cook for 1-2 minutes or until the carrots is slightly welted.

Remove the wok/skillet let for the heat source.

Enjoy!
Recent Posts


Be sure to follow me on Facebook, Instagram, Twitter, Pinterest, YouTube or subscribe to the blog for emails and receive free EatFoodlicious recipes daily.
Share on social media

Teriyaki Chicken Udon Noodles
Quick and easy Teriyaki Chicken Udon Noodles with a ready made sauce that tastes delicious and is very filling.
Ingredients
- 2 pack pre-cooked udon noodles about 7 oz each
- 12 oz boneless skinless chicken thighs cut into cubes
- 4 tbsp teriyaki sauce
- 2 tbsp vegetable or canola oil
- 3 garlic cloves minced
- 1 carrot julienne
- ½ onion sliced
Instructions
Noodles
- In a pot, boil some water. Cook the noodles until they loosen. Drain and set aside.
Stir- Fry
- Cut the chicken into cubes.
- Heat the wok/skillet to medium-high. Add oil and wait for 30 seconds. Add chicken, 6 tbsp teriyaki sauce, diced garlic, grated ginger and mix everything together. Cook for 6-8 minutes. Once, the glaze has nearly evaporated, add sliced onions and cook for another 2-3 minutes.
- Add noodles and 1-2 tbsp teriyaki sauce (optional). Mix the sauce with the noodles. Turn up the heat to high. Add carrots and mix everything together. Cook for 1-2 minutes or until the carrots is slightly welted. Remove the wok/skillet let for the heat source.
Serve & Enjoy!
Video
Tried this recipe?Mention @eatfoodlicious or tag #eatfoodlicious!
Asian Recipes


Noodle Recipes


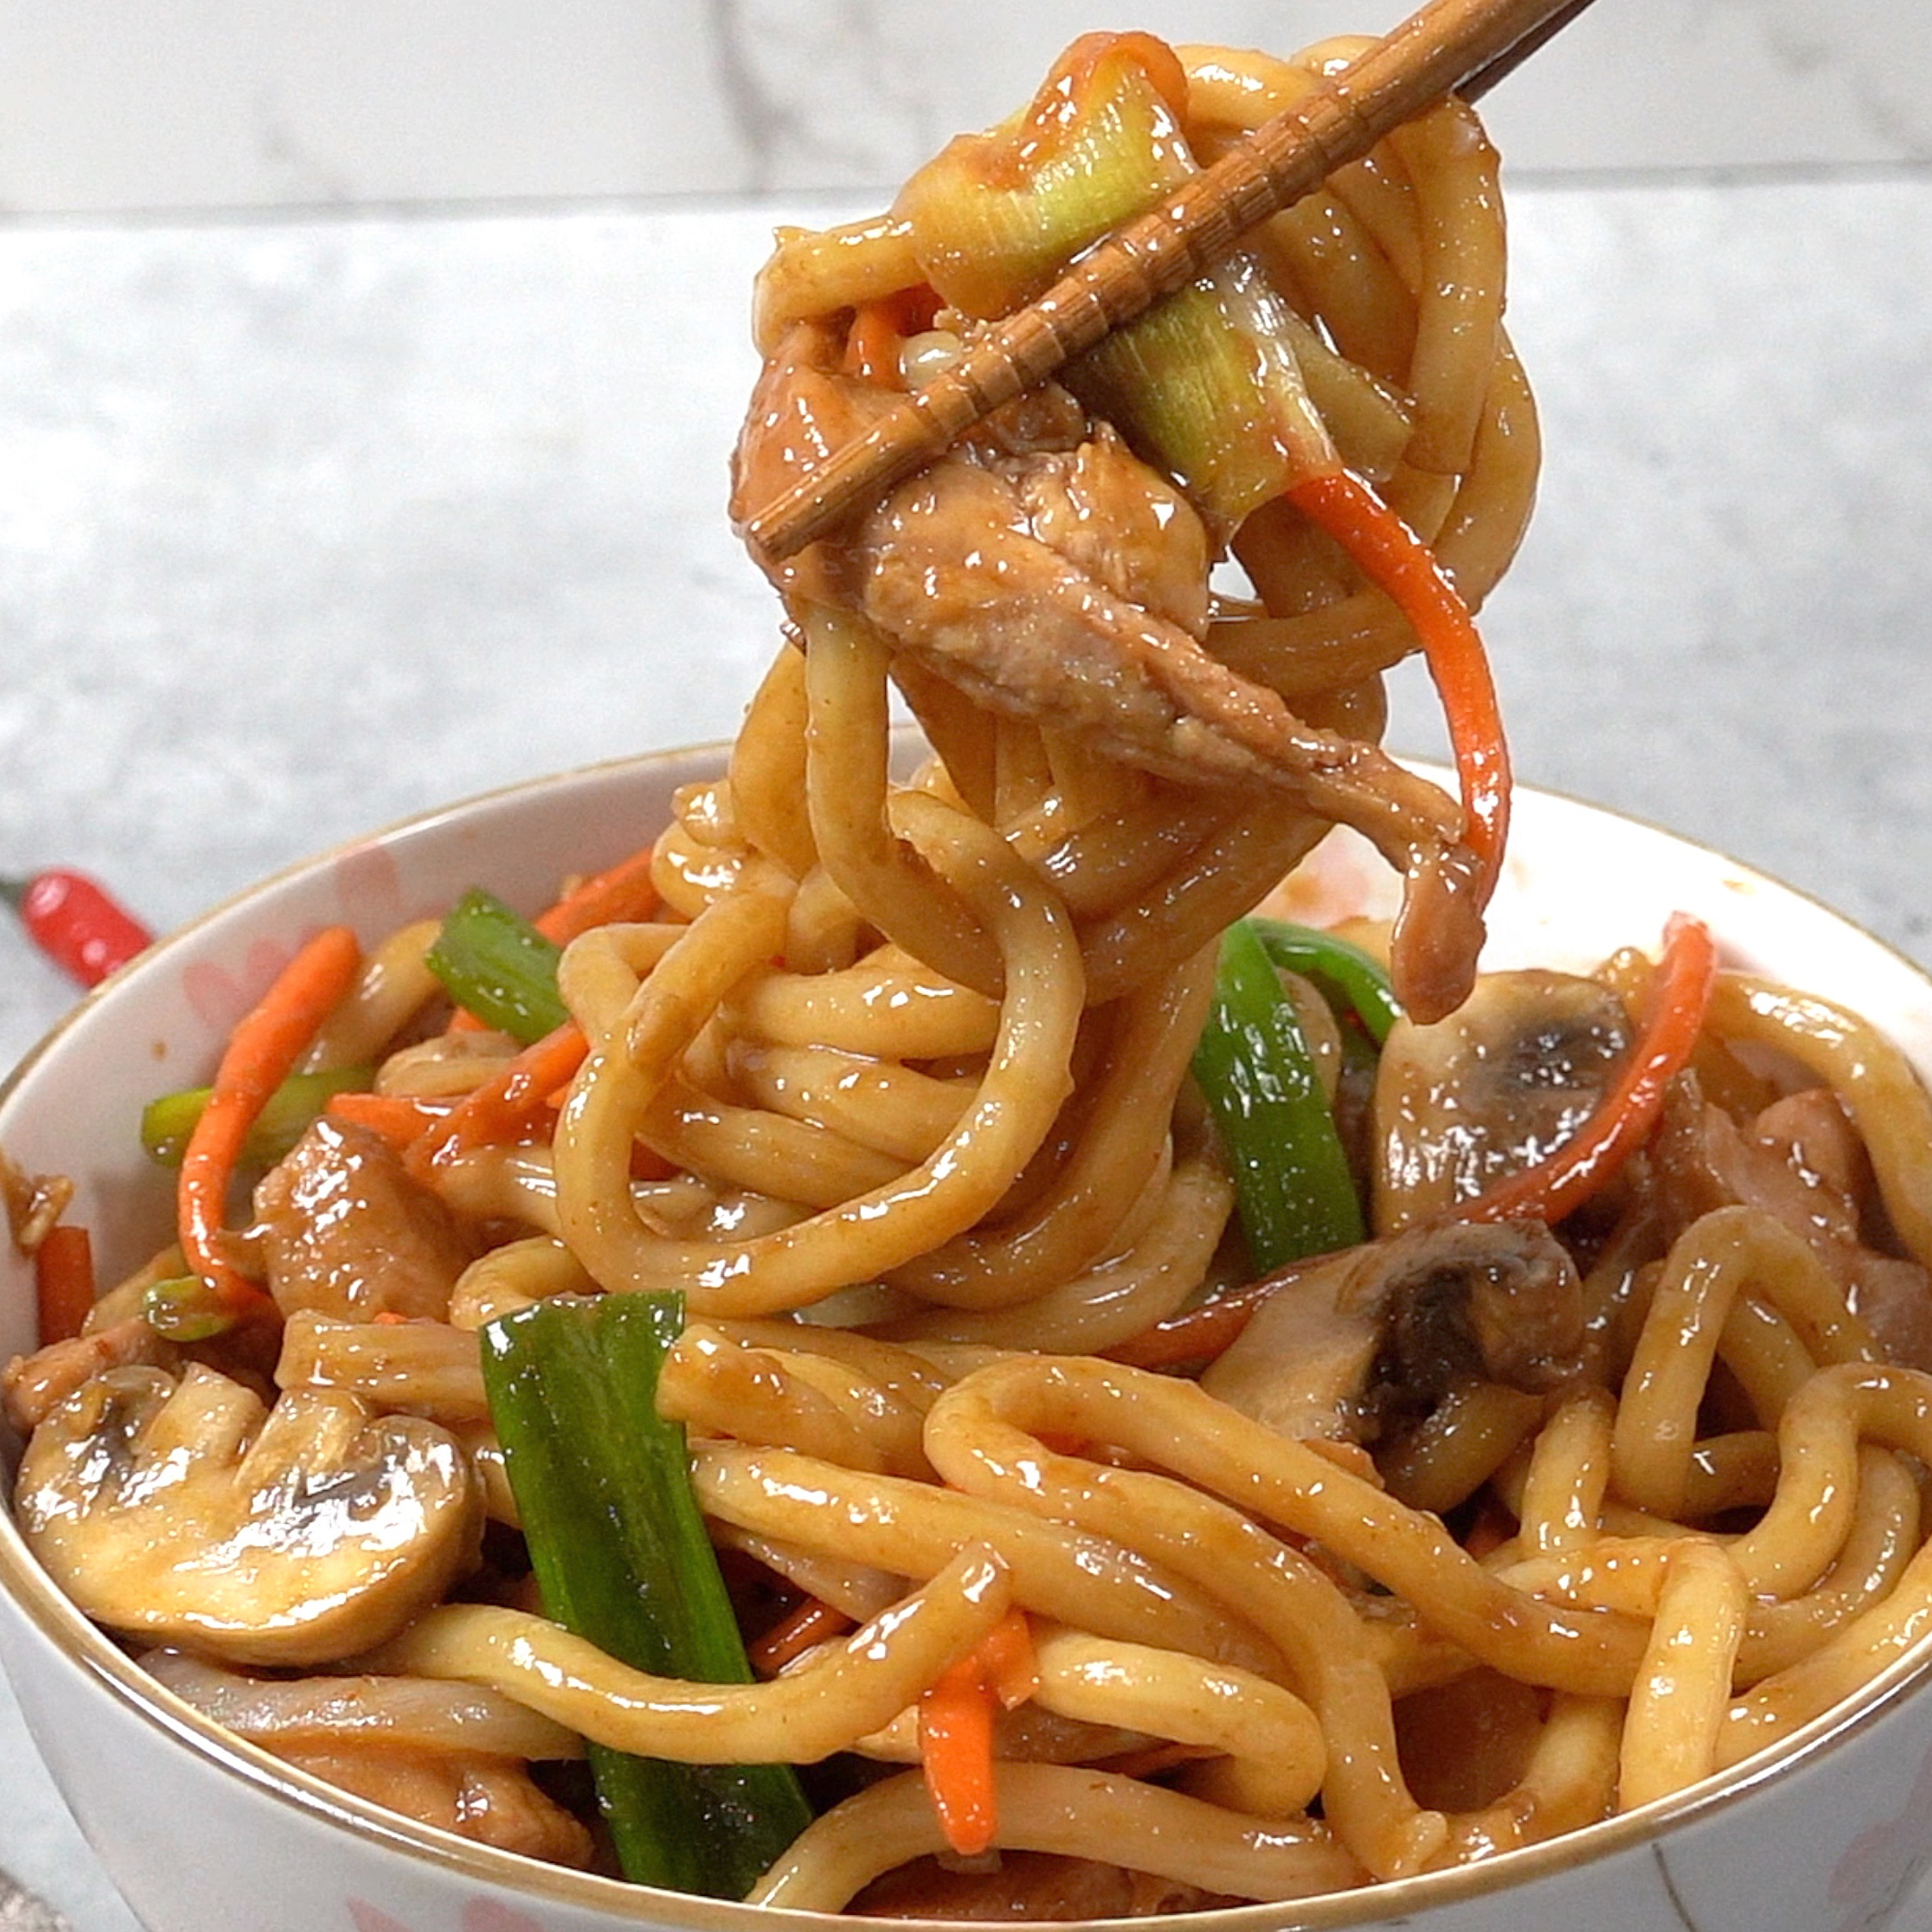
Hoisin Chicken Udon Noodles
Hoisin coated thick and chewy udon noodles served with delicious tender and flavorful chicken is a very simple and quick meal that is ready in less than 20 minutes.
Stir Fry Hoisin Chicken Udon Noodles is a savory and delicious dish that is a great option for a quality meal on a budget. Udon noodles are normally produced with a more delicate wheat than Italian pasta, which creates a bit softer texture. They can be found at Japanese (Asian) markets and in many grocery stores or supermarkets. Similar to Chinese style noodles these are great in a stir fry. Also feel free to substitute the meat with pork, shrimp (your choice of protein), or almost any vegetable you may like. My family loves this recipe and I am sure yours will too.
Watch the video and follow the instructions below to have this Japanese staple as your next hot meal. Like and share this or any of the recipes you find interesting form my growing catalogue of menu selections. Don’t forget to hit the subscribe button to stay up to date on all the latest eatfoodlicious publications. Thanks for visiting my site and leave a comment for any recommendations you would like to see me try. See you again soon!
Please follow Facebook, Instagram, Twitter , Pinterest, or subscribe to my YouTube channel.

In bowl, combine all the ingredients together and mix.

In a pot, boil some water. Cook the noodles until they loosen. Drain and set aside. Cut the chicken into cubes. Heat the wok/skillet to medium-high. Add oil and wait for 30 seconds.

Add chicken and half of the sauce. Cook for 8-10 minutes or until the sauce nearly reduced in half.

Add minced garlic, grated ginger, sliced onions and cook for 1 minute. Add sliced mushrooms and mix everything together.

Add softened noodles with the rest of the sauce and mix everything together.

Add carrots, sliced green onions and mix. Cook for another 1-2 minutes or carrots are slightly welted.

Remove the wok/skillet let for the heat source.

Serve

Optional: serve with fried egg(s).
Recent Posts


Be sure to follow me on Facebook, Instagram, Twitter, Pinterest, YouTube or subscribe to the blog for emails and receive free EatFoodlicious recipes daily.
Share on social media

Hoisin Chicken Udon Noodles
Hoisin coated thick and chewy Udon noodles served with delicious tender and flavorful chicken is a very simple and quick meal that is ready in less than 20 minutes.
Ingredients
- 2 pack pre-cooked udon noodles about 7 oz each
- 12 oz boneless skinless chicken thighs cut into cubes
- 4 oz mushrooms sliced
- ½ tbsp grated ginger
- 3 green onions sliced
- 3 garlic cloves minced
- 1 carrots julienne
- ½ onion sliced
Sauce
- ¼ cup hoisin sauce
- 2 tbsp soy sauce
- 2 tbsp water
- 1 tbsp sriracha sauce
- 1 tbsp rice vinegar
- 1 tbsp sesame oil
- 1 tbsp dark soy sauce
Instructions
Sauce
- In bowl, combine all the ingredients together and mix.
Noodles
- In a pot, boil some water. Cook the noodles until they loosen. Drain and set aside.
Stir-Fry
- Cut the chicken into cubes.
- Heat the wok/skillet to medium-high. Add oil and wait for 30 seconds. Add chicken and half of the sauce. Cook for 8-10 minutes or until the sauce nearly reduced in half. Add minced garlic, grated ginger, sliced onions and cook for 1 minute. Add sliced mushrooms and mix everything together. Add softened noodles with the rest of the sauce and mix everything together. Add carrots, sliced green onions and mix. Cook for another 1-2 minutes or carrots are slightly welted. Remove the wok/skillet let for the heat source.
Optional: serve with fried egg(s).
Enjoy!
Video
Tried this recipe?Mention @eatfoodlicious or tag #eatfoodlicious!
Asian Recipes


Noodle Recipes


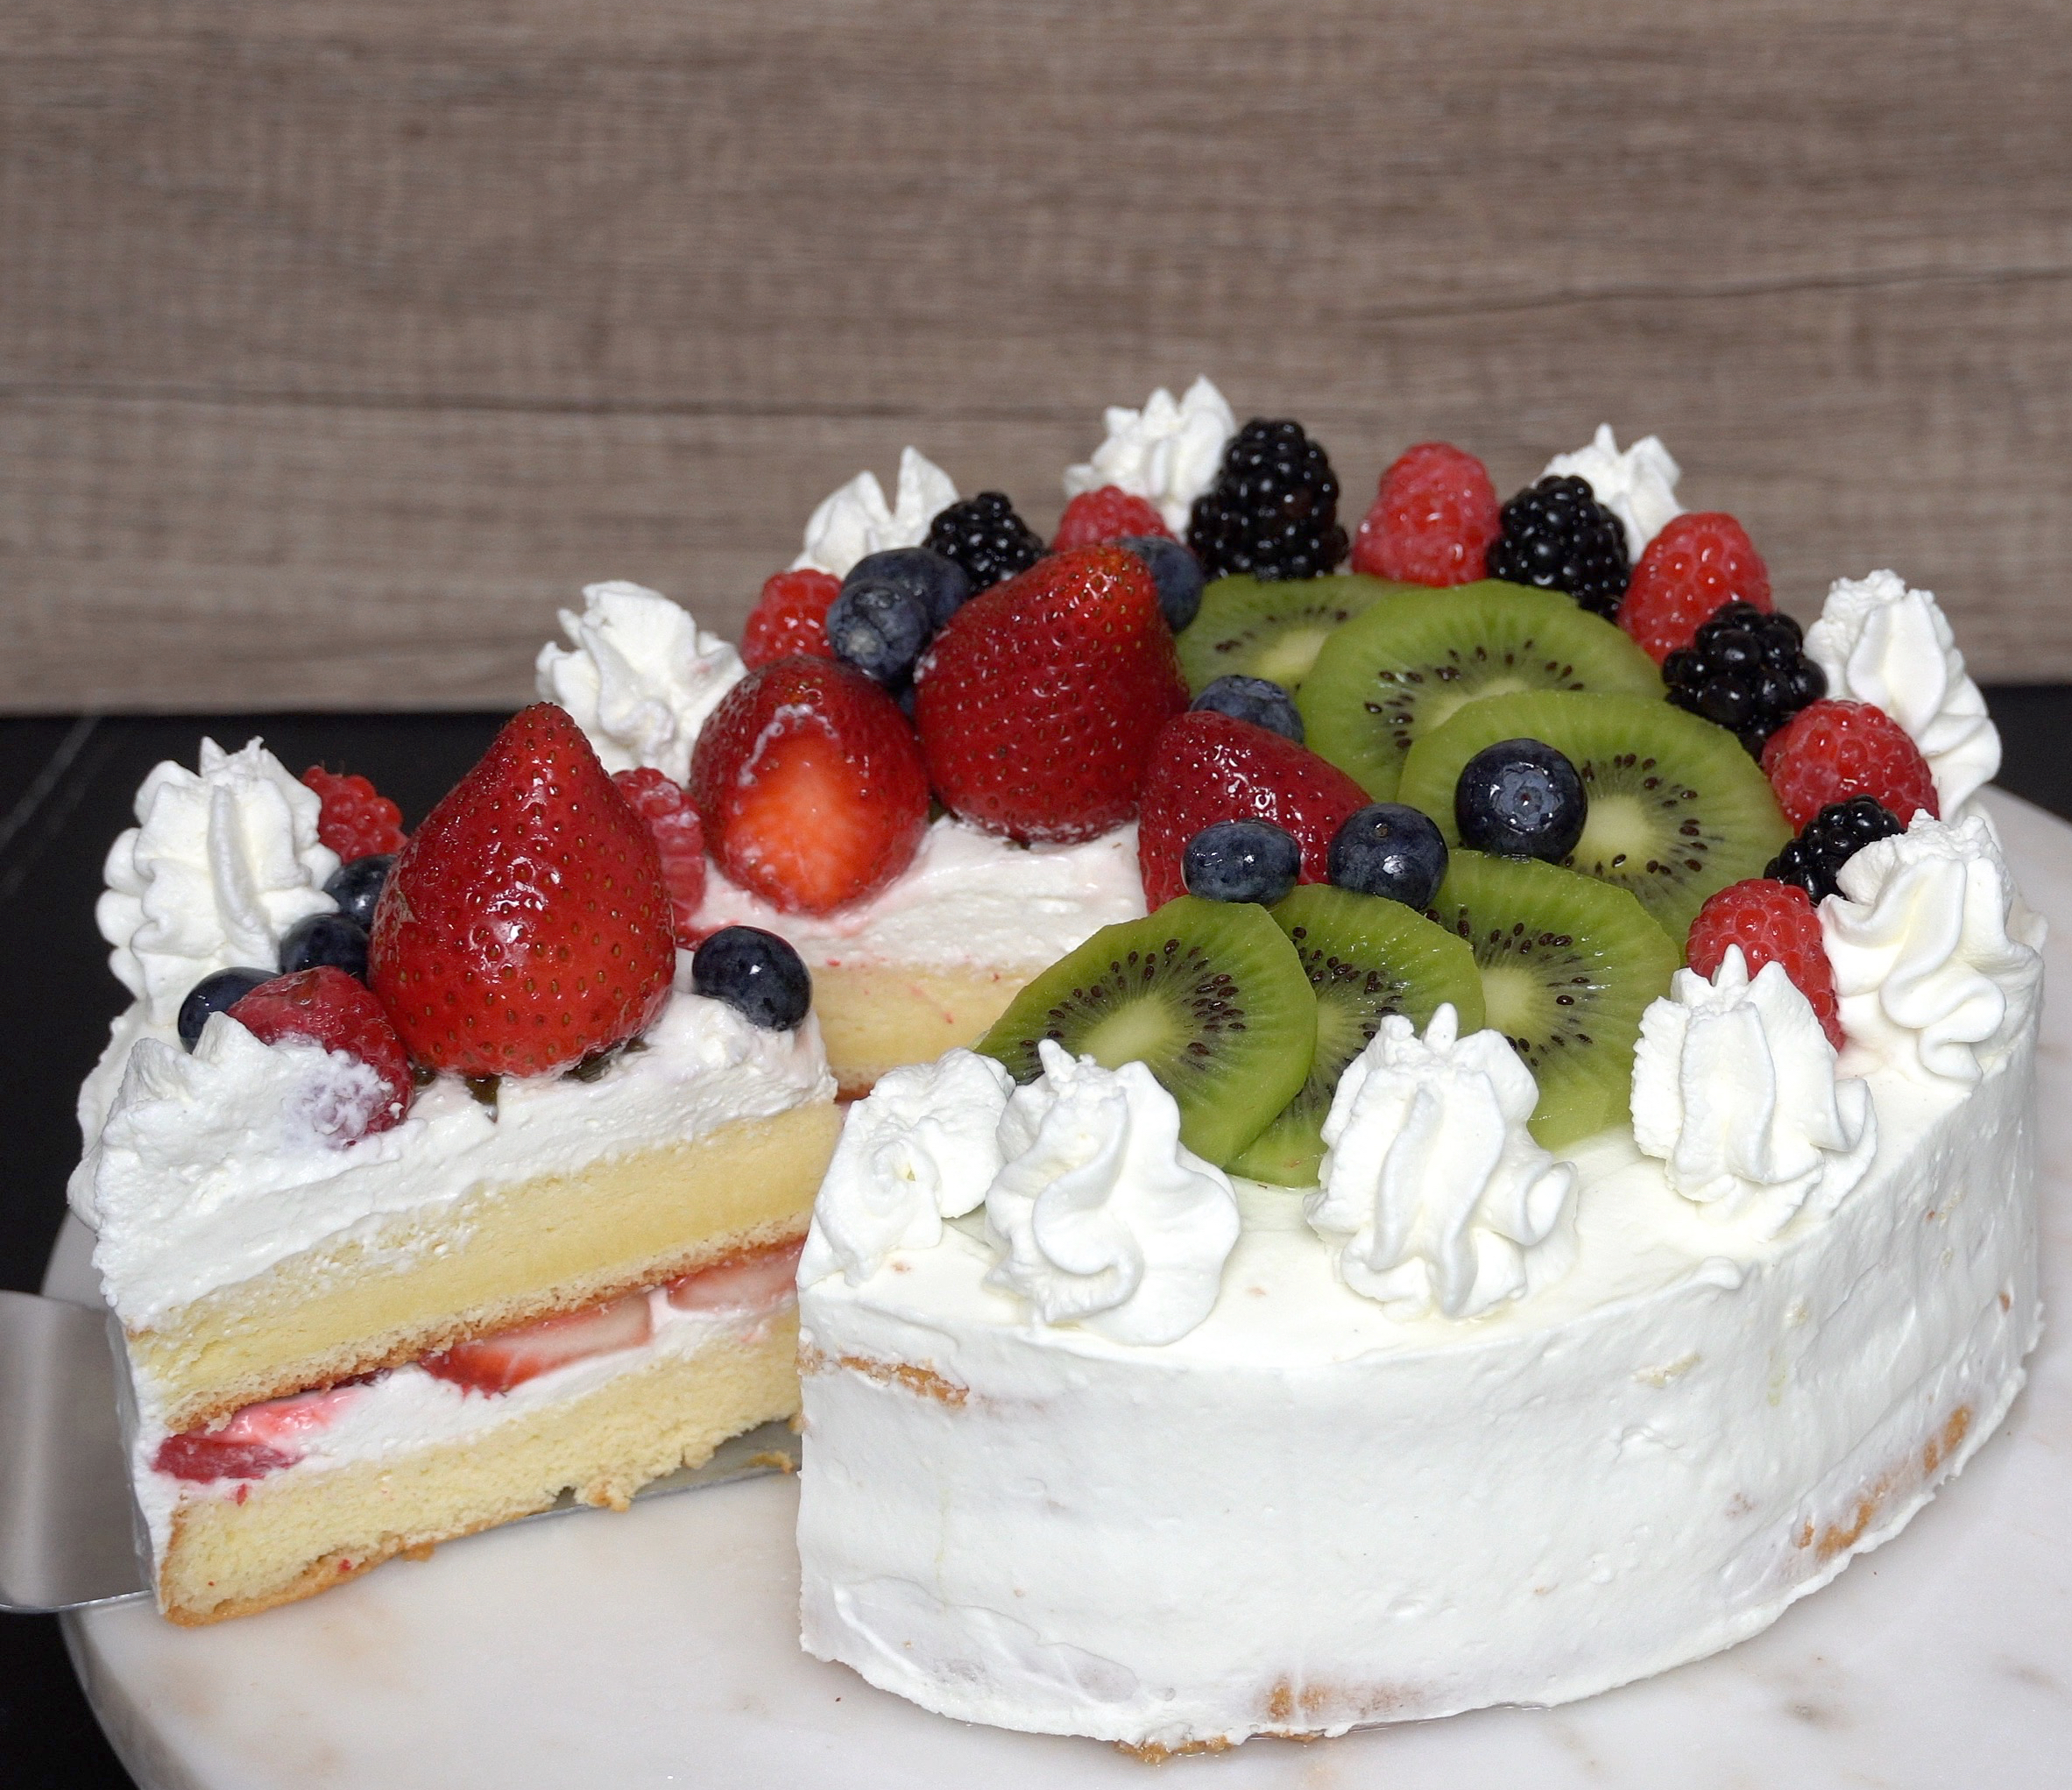
Asian Fresh Fruit Cake
Asian Fresh Fruit Cake is a delicacy created using traditional homemade techniques for a well developed rich, moist sponge cake that is absolutely beautiful when covered in the stabilized whipped cream that tastes even better than it looks. This cake is commonly found in asian markets, but mine is better.

Heavenly moist rich Asian Fresh Fruit Cake is a delicious authentic Asian style sponge cake that will hypnotize you with its allure as your senses tingle with pleasure from the fresh flavors. The stabilized whipped cream is perfectly balanced with sweetness and is very good with your favorite fresh fruit. This recipe unlocks some secretes to a style of cake that is traditionally an Asian store featured item. The cake is not too sweet and is almost subtle in how elegant it delivers its taste profile. The combination of homemade and natural made flavors are perfect on any occasion. I highly recommend trying this recipe at least once to see for yourself just how delicious it really is.
Watch the video and follow the instructions below to have this Asian Fresh Fruit Cake on a plate near you. Like and share this or any of my recipes you find interesting from my growing catalogue of menu selections. Don’t forget to hit the subscribe button to stay up to date on all the latest eatfoodlicious publications. This is perfect for celebrations, gatherings or just with a nice cup of tea or coffee. Thanks for visiting and I hope you enjoy this dessert on your next eatfoodlicious experience.
Please follow Facebook, Instagram, Twitter , Pinterest, or subscribe to my YouTube channel.

Separate the egg whites from the egg yolks.

In a medium bowl: Combine 4 egg yolks and ¼ cup of sugar. Beat for 3-4 minutes or until smooth and light yellow. Add vanilla extract, canola oil, milk and mix.

Add flour, baking powder & salt to the bowl. Make sure that you sift the dry ingredients before mixing them into the wet ingredients.

Mix everything together.

In a separate large bowl: add the 4 egg whites and whip for 4-5 minutes until soft peaks begin to form. Continue to whip while adding 2 tbsp sugar to the bowl, then add the other 2 tbsp of sugar while whipping until stiff peaks. Add cream of tartar, vanilla extract and whip until stiff peak forms.

Use a spatula and fold the ¼ of the egg whites into the egg yolk mixture. Repeat this step 3 more times and fold them together until consistent and smooth. Divide the batter into 2 round pans (8″). Use a toothpick: make zig zag lines to remove air bubbles. Lift and tap the pans a few times to remove extra air bubbles from the batter.

Bake for 25 minutes. Remove cake pan from the oven and let sit on a baking rack (1″ above a flat surface) for 15 minutes. Remove cake from the pan and let completely cool on the baking rack.

Stabilized Whipped Cream
Place a metal bowl & whisk attachments in the freezer for 1 hour. Just right before you remove the bowl from the freezer. In a small bowl: combine cold water, gelatin and mix until well combined. Microwave the gelatin in 45-60 seconds or until it becomes liquid forms & set aside. Add cold heavy whipping cream to the bowl and whip for 6-8 minutes until stiff begins to form. Add powdered sugar, vanilla extract and whip until well combined. Slowly add warm gelatin mixture (microwave again if needed) and whip until stiff peaks. Refrigerate until ready to use.

Assemble
Cake Syrup – In a small bowl: add 2 tbsp sugar and 4 tbsp boiling hot water. Mix until the sugar is fully dissolved. Use a cake leveler- slice the cake into a level layers. Place cake on a clean plate/cake tray. Brush a generous amount of cake syrup on top of the 1st layer cake

Then add a thick layer of whipped cream on top.

Add sliced strawberries on the cream. Carefully add the 2nd layer cake on top of the strawberries, then brush with the rest of the syrup.

Spread whipped cream on top and sides of the cake.

Use a cake scraper to level and smooth the cream. Place cake back in the refrigerator for 1 hour.

Fruit Syrup – In a small bowl: add 2 tbsp sugar and 2 tbsp boiling hot water. Mix until the sugar is fully dissolved and set aside. While the cake is in the refrigerator: rinse, clean & pat dry the fresh fruits with a paper towel. Remove the cake from the refrigerator. Decorate the cake with fresh fruits, then brush the syrup on top of the fruits. Place the cake back in the refrigerator for 30 minutes. Just before serving decorate with whipped cream.

Slice & Enjoy!
Recent Posts


Be sure to follow me on Facebook, Instagram, Twitter, Pinterest, YouTube or subscribe to the blog for emails and receive free EatFoodlicious recipes daily.
Share on social media

Asian Fresh Fruit Cake
Asian Fresh Fruit Cake is a delicacy created using traditional homemade techniques for a well developed rich, moist sponge cake that is absolutely beautiful when covered in the stabilized whipped cream that tastes even better than it looks. This cake is commonly found in asian markets, but mine is better.
Equipment
Ingredients
Cake
- 4 large eggs
- 1 cup cake flour
- ½ cup (divided) granulated sugar
- ½ cup whole milk room temp
- ¼ cup canola oil
- 1 tsp baking powder
- 1 tsp vanilla extract
- ½ tsp salt
- ½ tsp cream of tartar
Stabilize Whipped Cream
- 2 ½ cups cold heavy whipping cream
- ¼ cup powdered sugar
- ½ tsp vanilla extract
- 2 tbsp water
- 2 tsp gelatin no flavor
Cake Syrup
- 4 tbsp hot water
- 2 tbsp sugar
Fruit Syrup
- 2 tbsp hot water
- 2 tbsp sugar
Fruits
- 1 lb fresh strawberries clean & slice
- Toppings – strawberries, kiwi , blueberries, blackberries, raspberries
Instructions
- Preheat the oven to 325°F. Place parchment paper on the bottom of the two 8" round pan & grease the sides with cooking flour spray or butter. Separate the egg whites from the egg yolks. Set aside.
- In a medium bowl: Combine 4 egg yolks and ¼ cup of sugar. Beat for 3-4 minutes or until smooth and light yellow. Add vanilla extract, canola oil, milk and mix. Add flour, baking powder & salt to the bowl. Mix everything together. Make sure that you sift the dry ingredients before mixing them into the wet ingredients.
- In a separate large bowl: add the 4 egg whites and whip for 4-5 minutes until soft peaks begin to form. Continue to whip while adding 2 tbsp sugar to the bowl, then add the other 2 tbsp of sugar while whipping until stiff peaks. Add cream of tartar, vanilla extract and whip until stiff peak forms.
- Use a spatula and fold the ¼ of the egg whites into the egg yolk mixture. Repeat this step 3 more times and fold them together until consistent and smooth.
- Divide the batter into 2 round pans (8"). Use a toothpick: make zig zag lines to remove air bubbles. Lift and tap the pans a few times to remove extra air bubbles from the batter.
- Bake for 25 minutes. Remove cake pan from the oven and let sit on a baking rack (1" above a flat surface) for 15 minutes. Remove cake from the pan and let completely cool on the baking rack.
Stabilized Whipped Cream
- Place a metal bowl & whisk attachments in the freezer for 1 hour. Just right before you remove the bowl from the freezer. In a small bowl: combine cold water, gelatin and mix until well combined. Microwave the gelatin in 45-60 seconds or until it becomes liquid forms & set aside
- Add cold heavy whipping cream to the bowl and whip for 6-8 minutes until stiff begins to form. Add powdered sugar, vanilla extract and whip until well combined. Slowly add warm gelatin mixture (microwave again if needed) and whip until stiff peaks. Refrigerate until ready to use.
Assemble
- Cake Syrup – In a small bowl: add 2 tbsp sugar and 4 tbsp boiling hot water. Mix until the sugar is fully dissolved.
- Use a cake leveler- slice the cake into a level layers. Place cake on a clean plate/cake tray. Brush a generous amount of cake syrup on top of the 1st layer cake, then add a thick layer of whipped cream on top. Add sliced strawberries (1 lb) on the cream. Carefully add the 2nd layer cake on top of the strawberries, then brush with the rest of the syrup. Spread whipped cream on top and sides of the cake. Use a cake scraper to level and smooth the cream. Place cake back in the refrigerator for 1 hour.
- Fruit Syrup – In a small bowl: add 2 tbsp sugar and 2 tbsp boiling hot water. Mix until the sugar is fully dissolved and set aside. While the cake is in the refrigerator: rinse, clean & pat dry the fresh fruits with a paper towel.
- Remove the cake from the refrigerator. Decorate the cake with fresh fruits, then brush the syrup on top of the fruits. Place the cake back in the refrigerator for 30 minutes. Just before serving decorate with whipped cream.
Slice, serve & enjoy!
Video
Tried this recipe?Mention @eatfoodlicious or tag #eatfoodlicious!
Baked Goods


Asian Recipes


Air Fryer Chicken Teriyaki Skewers
Beautiful Air Fryer Chicken Teriyaki Skewers are Sweet deliciously tasty and good to the last bite. Brushed to perfection these skewers are a simple and easy to make selection that is perfect on any occasion. Full of flavor, textures and at a budget price, this is perfect normal meal planning. Quick and tasty this recipe will drive everyone in the house to the table at neck break speed. I enjoyed this recipe and recommend you try it at least once to see for yourself how delicious it really is.
Watch the video and follow the instructions below to have tender and juicy Teriyaki Chicken Skewers today. Like and share this or any of my recipes you find interesting from my growing catalogue of menu selections. Don’t forget to hit the subscribe button to stay up to date on all the latest eatfoodlicious publications. Succulent and savory Teriyaki Chicken is perfect when served on a warm bed of Jasmine rice. Thanks for visiting and see you again soon.
Please follow Facebook, Instagram, Twitter , Pinterest, or subscribe to my YouTube channel.

In a sauce pan: add sake, mirin, soy sauce, sugar and whisk everything together. Cook on high heat for 3-5 minutes or until the sauce thickens and reduced to about 1 cup. make sure to stir frequently. Let cool at room temperature or place in the refrigerator for 1 hour. It will thicken as it cools. Divide the sauce in half (one is for the marinade & the other is for brushing over the chicken after it’s been cooked).

Trim off fat from the chicken thighs and cut into 2″ cubes. Place the chicken in a shallow dish.

Add ½ cup (about half) of the teriyaki sauce, ginger, garlic and mix everything together until well coated.

Cover and marinate for at least 2 hour or overnight (preferably).

Soak the 6″ skewers in water for 1 hour.

Thread the marinade chicken into the skewers. You should have about 7-9 skewers.

Preheat the air fryer to 400°F for 10 minutes. Then, coat the basket with cooking spray. Place chicken skewers on the basket and brush with marinate sauce, then discard the sauce.

Cook for 12 -13 minutes total. Flip the skewers after 6 minutes, brush with teriyaki sauce (the other half).

The chicken should be fully cooked (internal should be about 165°F).Transfer the skewers to a plate and brush with teriyaki sauce. Tent with aluminum foil until ready to serve.

Garnish with sesame seeds & chopped green onions.

Serve with rice, vegetables or salad. Enjoy!
Recent Posts


Be sure to follow me on Facebook, Instagram, Twitter, Pinterest, YouTube or subscribe to the blog for emails and receive free EatFoodlicious recipes daily.
Share on social media

Air Fryer Chicken Teriyaki Skewers
Gorgeous Air Fryer Chicken Teriyaki Skewers are tender, juicy and very delicious.
Equipment
- Air Fryer
Ingredients
- 2 lbs chicken thighs skinless & boneless
- 1 tsp ginger grated
- 1 tsp garlic grated
- 7-9 skewers
Teriyaki Sauce
- ½ cup soy sauce
- ½ cup mirin
- ½ cup sake Japanese rice wine
- ¼ cup sugar
Instructions
- In a sauce pan: add sake, mirin, soy sauce, sugar and whisk everything together. Cook on high heat for 3-5 minutes or until the sauce thickens and reduced to about 1 cup. make sure to stir frequently. Let cool at room temperature or place in the refrigerator for 1 hour. It will thicken as it cools. Divide the sauce in half (one is for the marinade & the other is for brushing over the chicken after it's been cooked).
- Trim off fat from the chicken thighs and cut into 2" cubes. Place the chicken in a shallow dish. Add ½ cup (about half) of the teriyaki sauce, ginger, garlic and mix everything together until well coated. Cover and marinate for at least 2 hour or overnight (preferably).
- Soak the 6" skewers in water for 1 hour. Thread the marinade chicken into the skewers. You should have about 7-9 skewers.
- Preheat the air fryer to 400°F for 10 minutes. Then, coat the basket with cooking spray. Place chicken skewers on the basket and brush with marinate sauce, then discard the sauce.
- Cook for 12 -13 minutes total. Flip the skewers after 6 minutes, brush with teriyaki sauce (the other half). The chicken should be fully cooked (internal should be about 165°F).Transfer the skewers to a plate and brush with teriyaki sauce. Tent with aluminum foil until ready to serve.
Garnish with sesame seeds & chopped green onions. Serve with rice, vegetables or salad. Enjoy!
Tried this recipe?Mention @eatfoodlicious or tag #eatfoodlicious!
Air Fryer Recipes


Chicken Recipes


Bourbon Chicken Bites
Delicious caramelized Bourbon Chicken is so tender and mouthwateringly satisfying that every bite is a comforting and filling reward. Easy to prep and even easier to plate, this recipe cuts right through the waste and gets to the center of where taste meets satisfaction. Savory and filling, this authentic styled dish is perfect on any occasion. Bourbon Chicken is a staple at the mall food court but once you have tried this recipe the natural flavors will stand on their own as the best selection for the lowest price. This is very good when served fresh and can be as fancy in the presentation as you want. This also keeps wonderfully refrigerated and makes for a very easy reheat and enjoy time saver for a busy week.
Watch the video and follow the instructions below to have tender and juicy Bourbon Chicken today. Like and share this or any of my recipes you find interesting from my growing catalogue of menu selections. Don’t forget to hit the subscribe button to stay up to date on all the latest eatfoodlicious publications. Succulent Bourbon Chicken is perfect when served on a warm bed of Jasmine rice. Thanks for visiting and see you again soon.
Please follow Facebook, Instagram, Twitter , Pinterest, or subscribe to my YouTube channel.

Trim fat from the meat of the chicken. Then, cut into cubes. Place chicken in a bowl.

Add soy sauce and cornstarch. Mix well. Cover and let marinate for 15 minutes.

In a bowl: combine all the sauce ingredients together and set aside until ready to use.

Heat the pan to medium-high. Add oil and wait for a few minutes. Cooking in 2 batches: add half of the marinated chicken to the hot pan. Sear all sides for 3 minutes total and then transfer to a plate/bowl.

Repeat: sear and transfer to a plate/bowl the second batch of chicken.

Add ginger, garlic and cook for 2-3 minutes or until fragrant. Pour in the Bourbon while gently mixing the ingredients in the pan. Let simmer for 1-2 minutes. Miix the sauce in the bowl to a uniform consistency one last time. Add the well mixed sauce to the hot pan while continuing to stir. Then, turn down the heat to medium.

Add seared chicken.

Let cook for 15-16 minutes or until the sauce thickens.

Garnish with sesame oil and chopped green onions.

Serve with white rice. Enjoy!
Recent Posts


Be sure to follow me on Facebook, Instagram, Twitter, Pinterest, YouTube or subscribe to the blog for emails and receive free EatFoodlicious recipes daily.
Share on social media

Bourbon Chicken Bites
Tender moist and very tasty, this Bourbon Chicken is simply delicious.
Ingredients
Marinate
- 1 ½ lbs chicken thighs
- 1 tsp soy sauce
- 1 tsp cornstarch
Sauce
- ½ cup water
- ¼ cup brown sugar
- ¼ cup soy sauce
- 2 tbsp rice vinegar
- 1 tbsp cornstarch
- 1 tsp sesame oil
- 1 tsp fresh ginger
- ¼ tsp white pepper
Additional
- 2 garlic cloves minced
- 2 tbsp cooking oil
- 2 tbsp Bourbon
Instructions
Marinate
- Trim fat from the meat of the chicken. Then, cut into cubes. Place chicken in a bowl. Add soy sauce and cornstarch. Mix well. Cover and let marinate for 15 minutes.
Cook
- In a bowl: combine all the sauce ingredients together and set aside until ready to use.
- Heat the pan to medium-high. Add oil and wait for a few minutes. Cooking in 2 batches: add half of the marinated chicken to the hot pan. Sear all sides for 3 minutes total and then transfer to a plate/bowl. Repeat: sear and transfer to a plate/bowl the second batch of chicken.
- Add ginger, garlic and cook for 2-3 minutes or until fragrant. Pour in the Bourbon while gently mixing the ingredients in the pan. Let simmer for 1-2 minutes.
- Mix the sauce mixture in the bowl to a uniform consistency one last time. Add the well mixed sauce to the hot pan while continuing to stir. Then, turn down the heat to medium.
- Add seared chicken and let cook for 15-16 minutes or until the sauce thickens.
Garnish with sesame oil and chopped green onions. Serve with white rice. Enjoy!
Video
Tried this recipe?Mention @eatfoodlicious or tag #eatfoodlicious!
Asian Recipes


Chicken Recipes


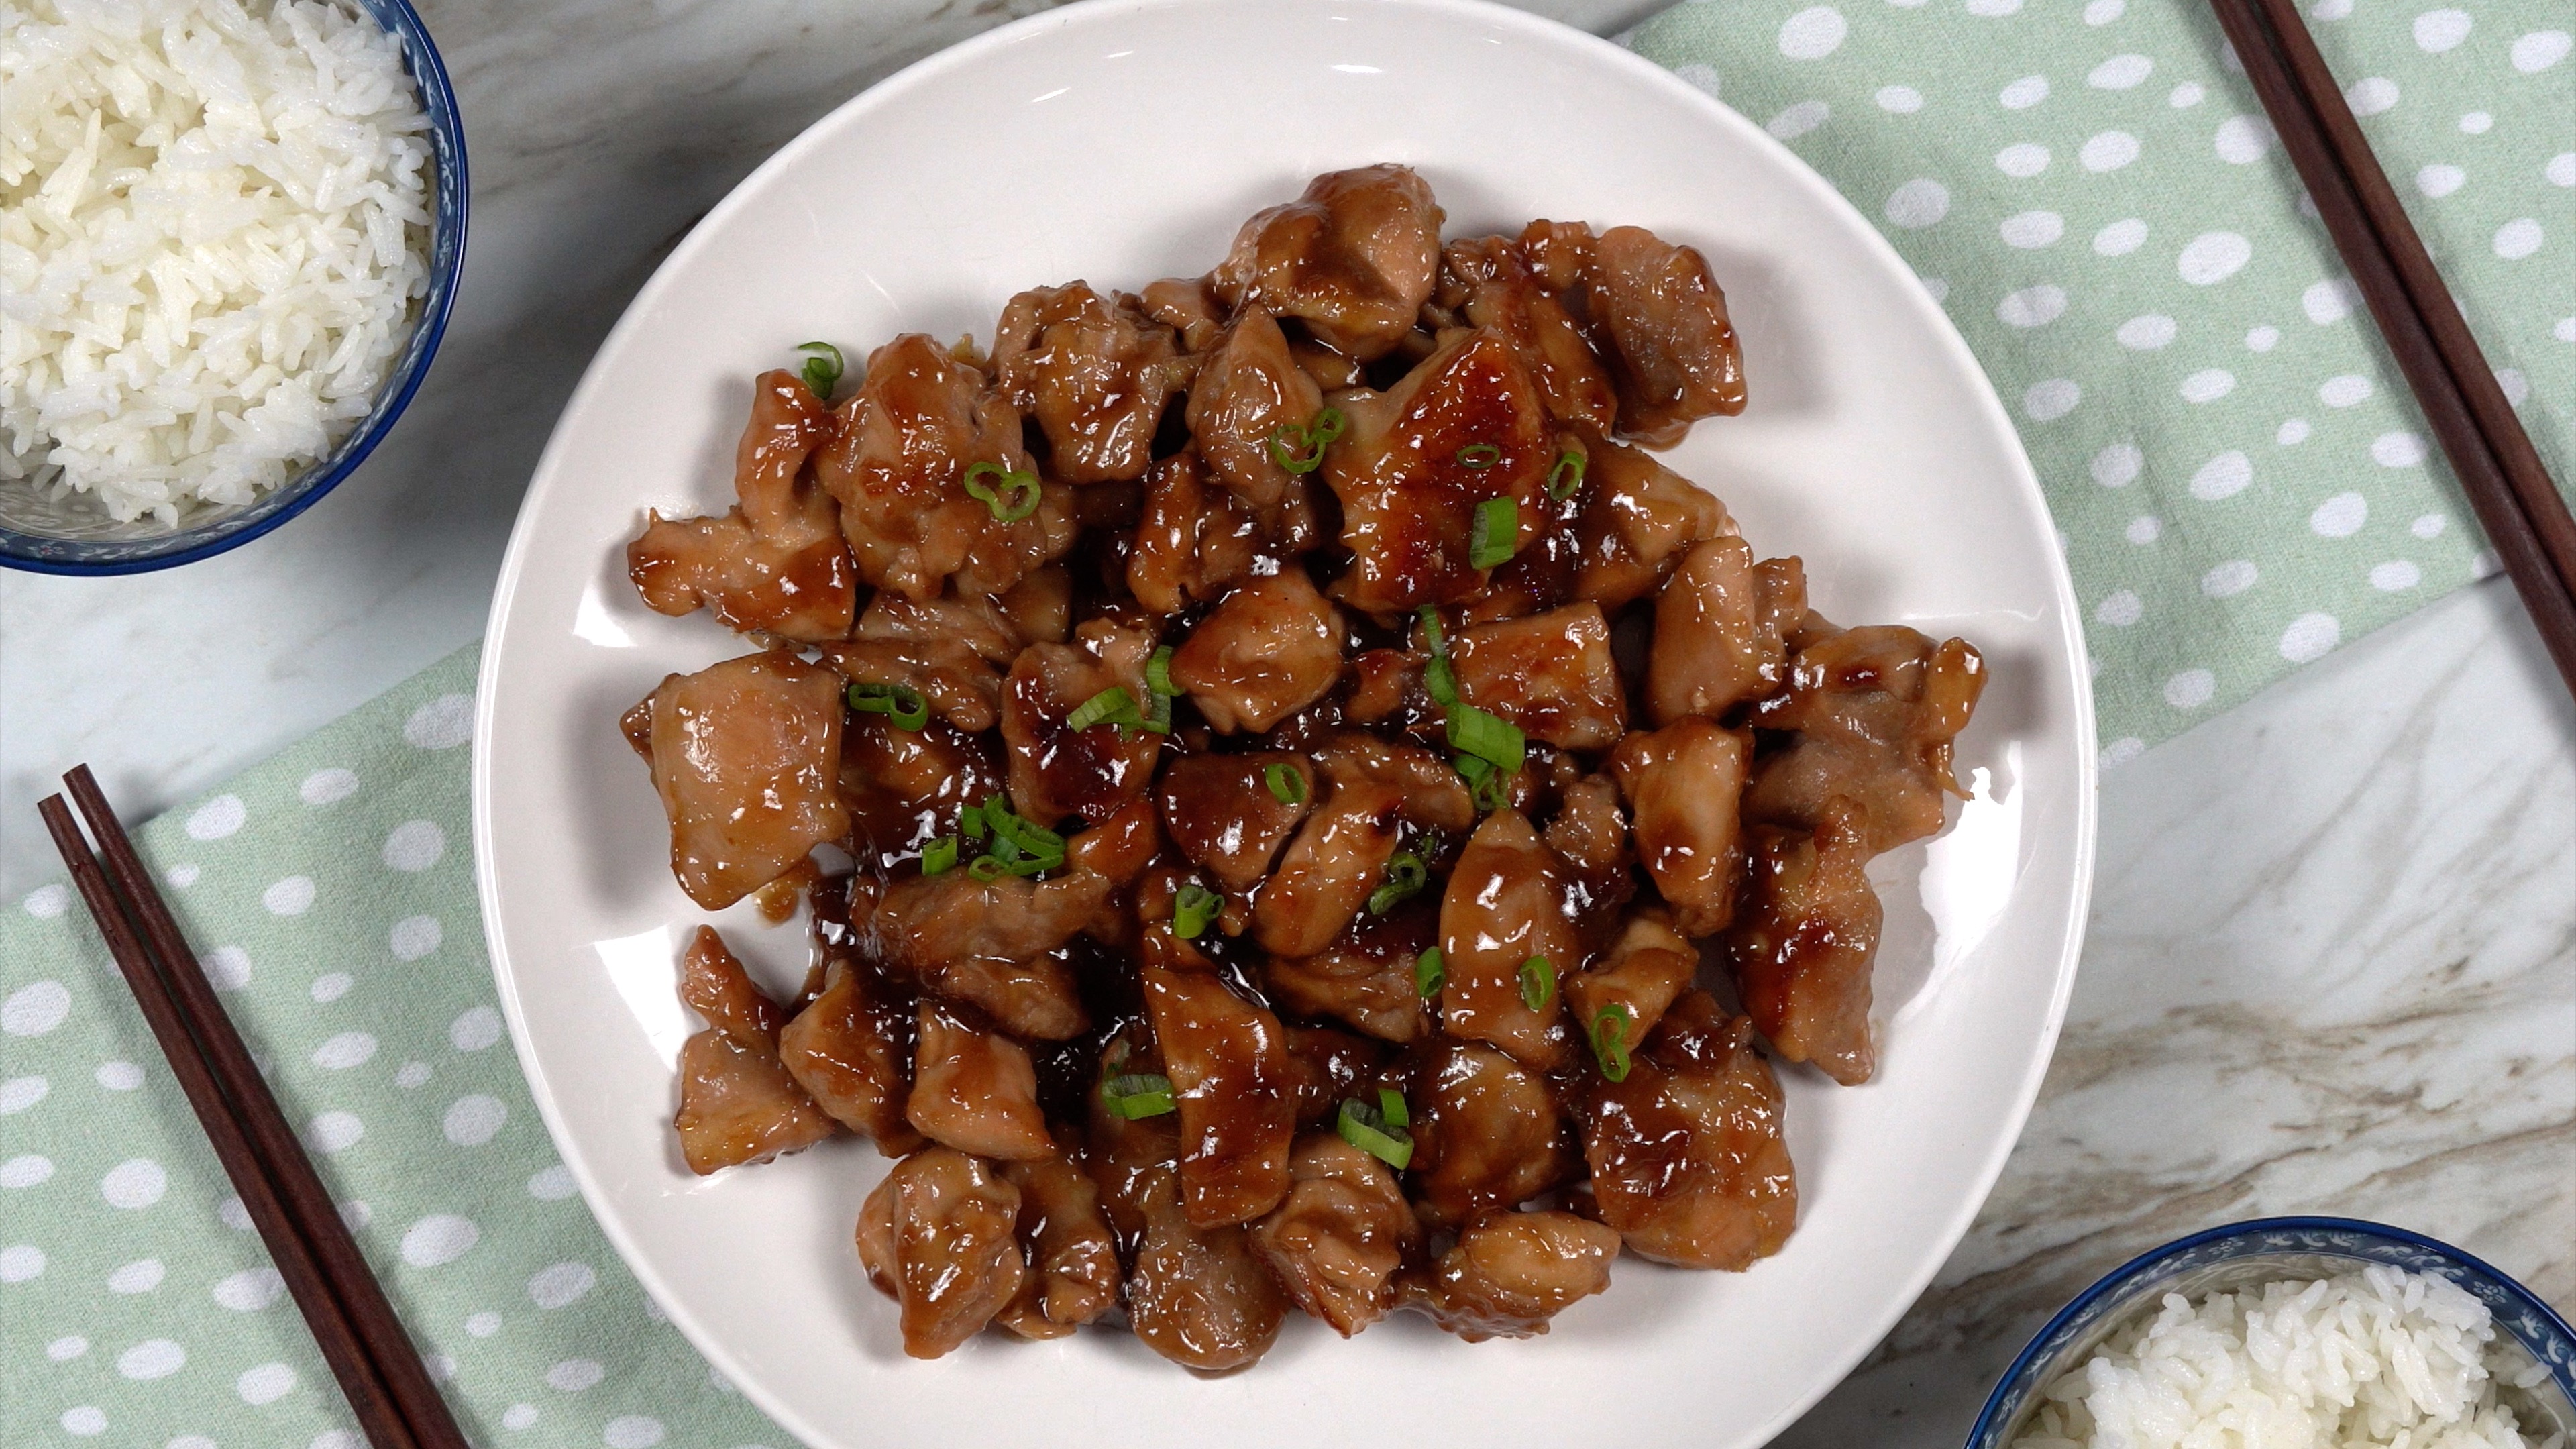
Teriyaki Chicken
Delicious caramelized Teriyaki Chicken is so tender and mouthwateringly satisfying that every bite is a comforting and filling reward. Easy to prep and even easier to plate, this recipe cuts right through the waste and gets to the center of where taste meets satisfaction. Savory and filling, this authentic styled dish is perfect on any occasion. Teriyaki Chicken is a staple at local restaurants but once you have tried this recipe the natural flavors will stand on their own as the best selection for the lowest price. This is very good when served fresh and can be as fancy in the presentation as you want. This also keeps wonderfully refrigerated and makes for a very easy reheat and enjoy time saver for a busy week.
Watch the video then follow the instructions below to have this beautifully aromatic entree ready to go today. Don’t forget to hit the subscribe button to stay up to date on my latest meal tutorials and presentation suggestions. Like and share this or any of the videos you find interesting from my growing catalog of menu selections. A warm serving of jasmine rice and a nice helping of this delicious recipe make a wonderfully meal the entire family will enjoy. Thanks and come back again real soon!
Please follow Facebook, Instagram, Twitter , Pinterest, or subscribe to my YouTube channel.

Trim off fat from the chicken thighs. Place the chicken, soy sauce, mirin, sake and the sugar in a ziplock bag or an airtight container. Shake and mix everything together. Marinate for at least 1 hour or overnight (preferably).

Heat the pan up to medium and add oil. Wait for 2 minutes. Remove chickens (reserve marinate sauce for glaze) from the bag/container and place in the hot pan.

Sear for 2-3 minutes per-side.

Add the marinade/sauce to the pan. Add 2 tbsp water, garlic, ginger and mix everything together. Cook for 6-8 minutes.

Once, the glaze has nearly evaporated, add another 2 tbsp of water to the pan and cook for another 4-5 minutes. Flip the chicken frequently to coat both sides with the glaze. Remove from heat source.

Serve chicken with rice.

Drizzle extra teriyaki sauce on top of the chicken. Enjoy!
Recent Posts


Be sure to follow me on Facebook, Instagram, Twitter, Pinterest, YouTube or subscribe to the blog for emails and receive free EatFoodlicious recipes daily.
Share on social media

Teriyaki Chicken
Smooth Teriyaki Chicken that is tender and delicious.
Ingredients
Marinate
- 4 chicken thighs boneless & skinless
- 2 tbsp sake
- 2 tbsp mirin
- 2 tbsp soy sauce
- 2 tbsp granulated sugar
Cook
- 2 tbsp cooking oil
- 1 tsp grated garlic
- 1 tsp grated ginger
- 4 tbsp (divided) water
Instructions
Marinate
- Trim off fat from the chicken thighs. Place the chicken, soy sauce, mirin, sake and the sugar in a ziplock bag or an airtight container. Shake and mix everything together. Marinate for at least 1 hour or overnight (preferably).
Cook
- Heat the pan up to medium and add oil. Wait for 2 minutes.
- Remove chickens (reserve marinate sauce for glaze) from the bag/container and place in the hot pan. Sear for 2-3 minutes per-side.
- Add the marinade/sauce to the pan. Add 2 tbsp water, garlic, ginger and mix everything together. Cook for 6-8 minutes. Once, the glaze has nearly evaporated, add another 2 tbsp of water to the pan and cook for another 4-5 minutes. Flip the chicken frequently to coat both sides with the glaze. Remove from heat source.
- Optional: Extra Teriyaki SauceIn a sauce pan: add 2 tbsp sake, 2 tbsp mirin, 2 tbsp soy sauce, 1 tbsp granulated sugar, 2 tbsp water and whisk everything together. Cook on medium heat for 3-5 minutes or until the sauce thickens. Set aside until ready to use.
Serve chicken with rice, vegetables or salad. Drizzle extra teriyaki sauce on top of the chicken. Enjoy!
Video
Tried this recipe?Mention @eatfoodlicious or tag #eatfoodlicious!
Chicken Recipes


Asian Recipes


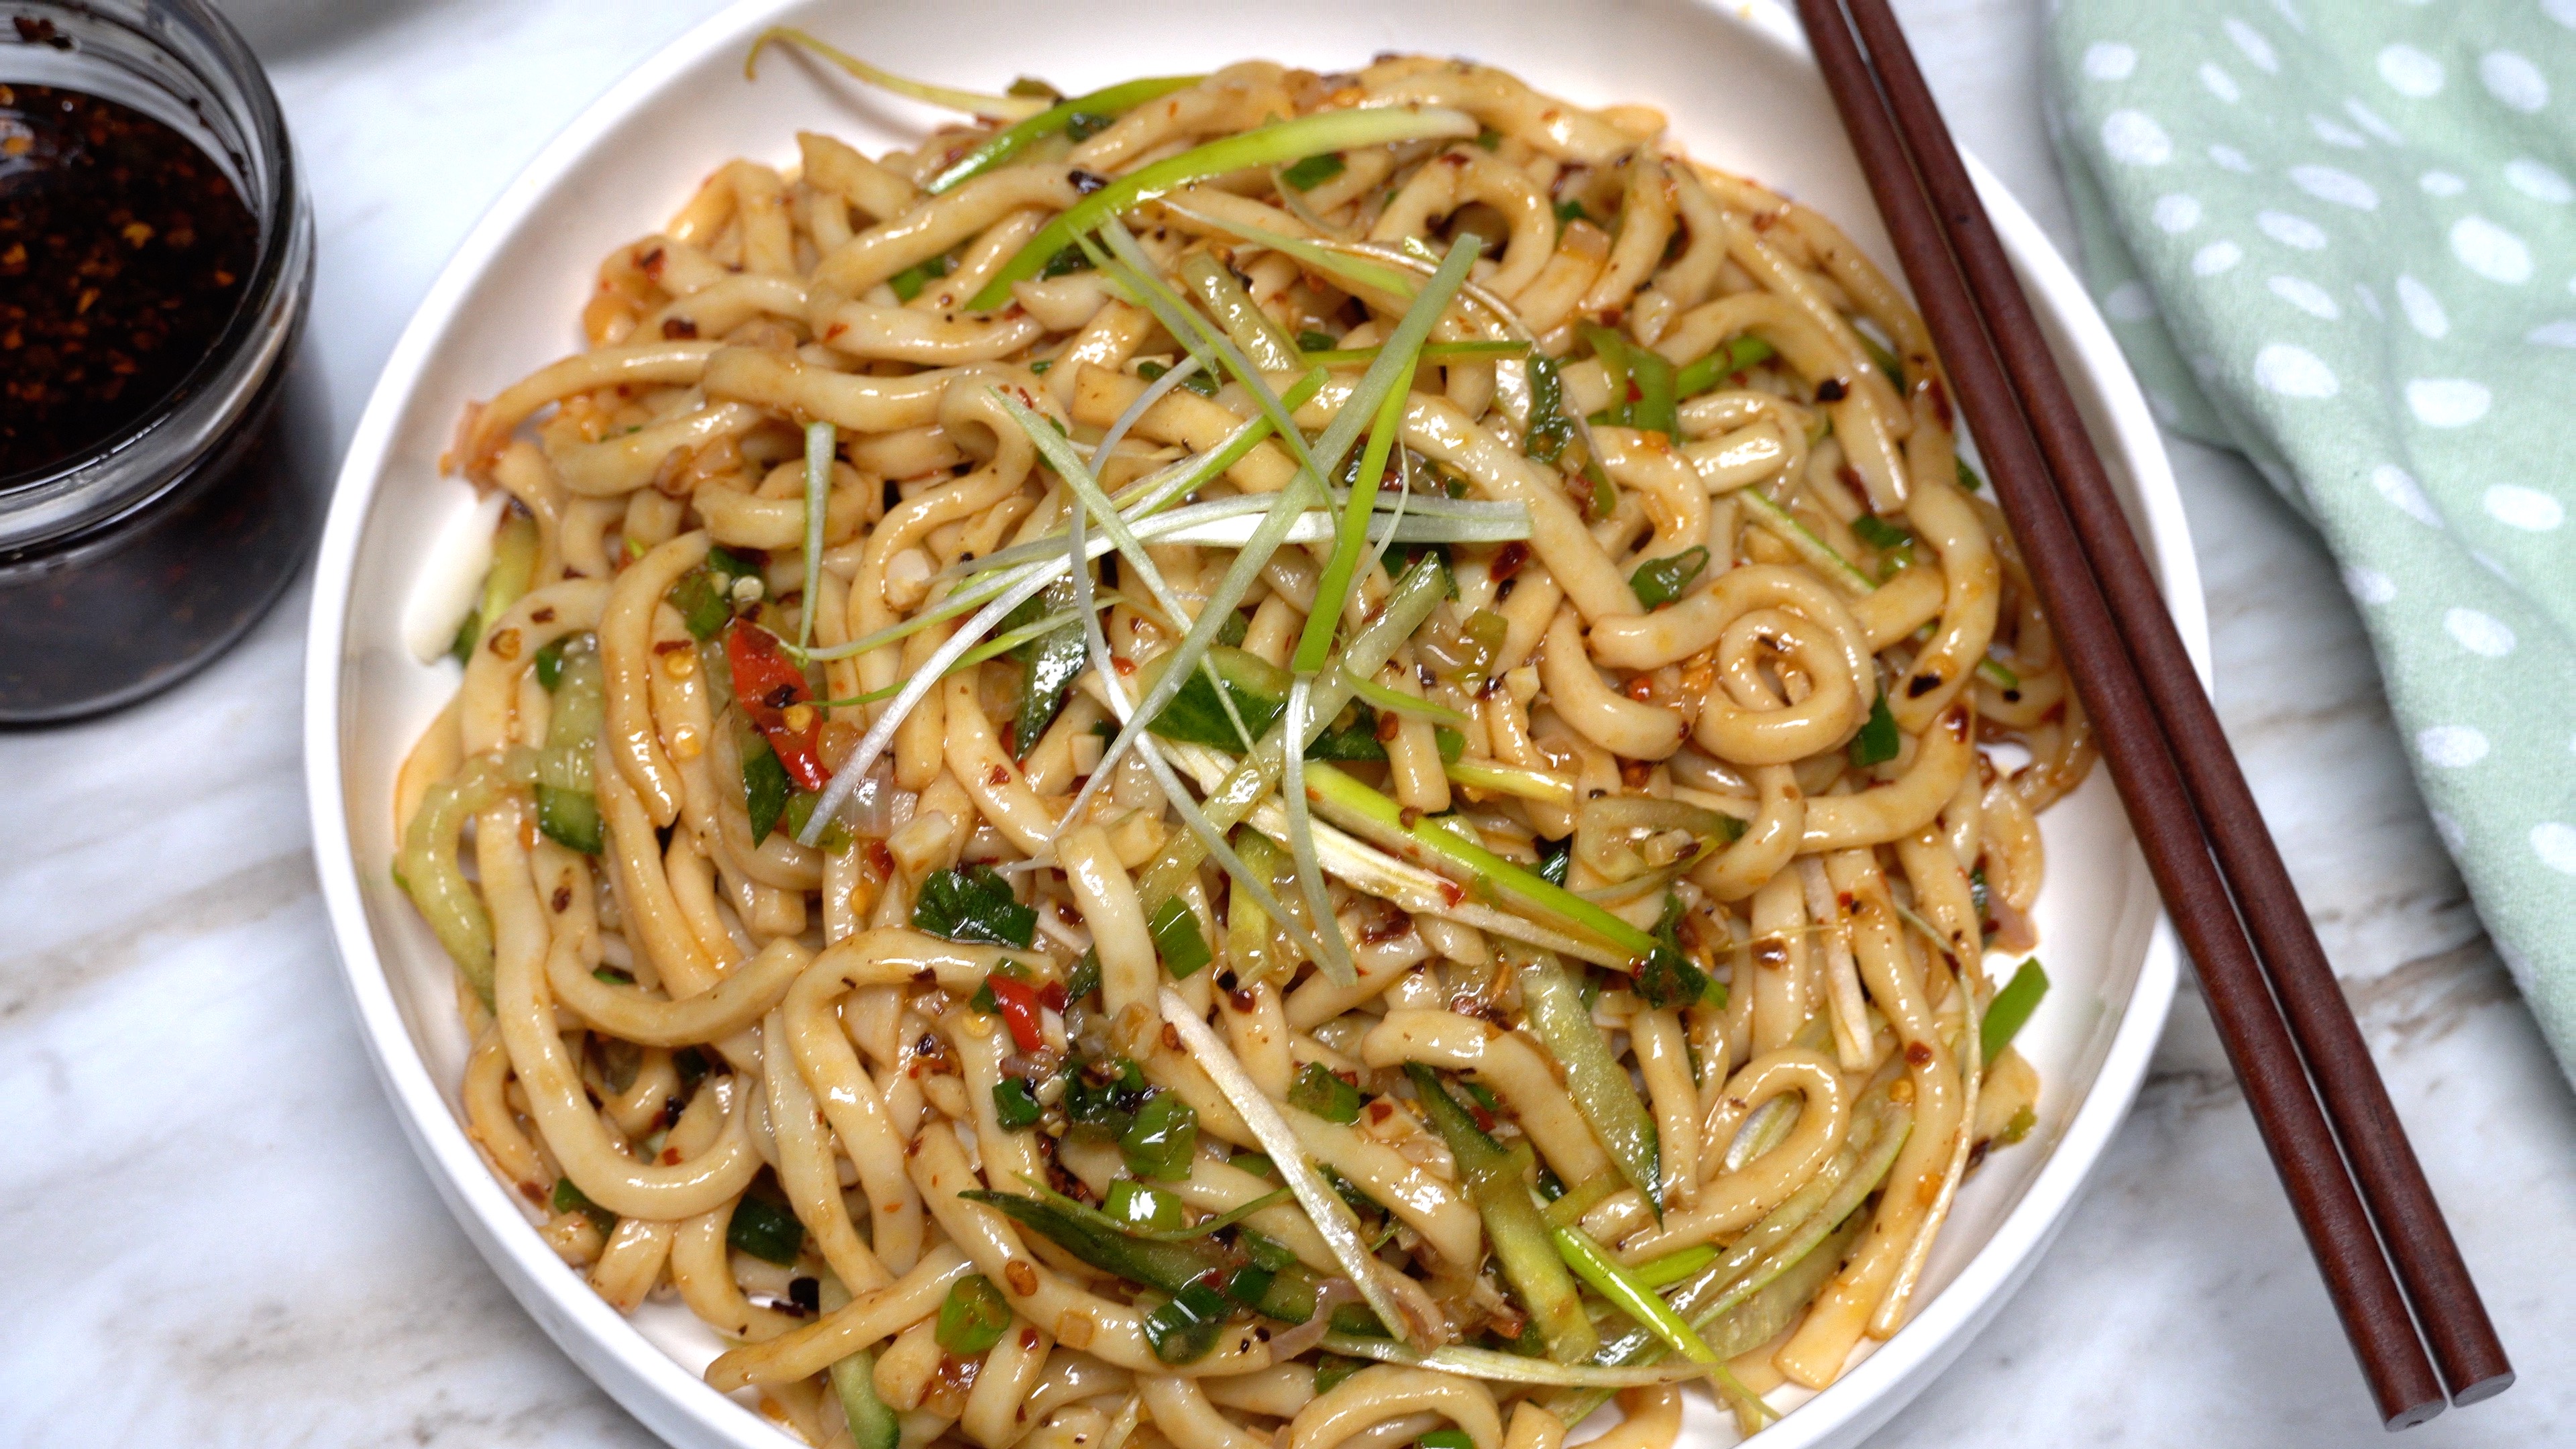
Spicy Udon Noodles
One of my personal favorite things to make for a quick and easy meal is this Udon Noodles recipe. I have eaten these noodles like these for most of my life; being brought up in a home where noodles and rice are a main staple for the table. If you look in my cabinets you will find a box of these noodles from the local grocery. The chew of a Udon Noodle is an elegant experience that heightens the sophistication of a simple work with what you got meal. I generally have the majority of these ingredients on hand or only need to grab one or two things at the store to complete the meal. I keep some Thai peppers in the refrigerator to nibble on while I work my way through a heaping serving. This is also simple to warm up later and keeps great under refrigeration. A couple of microwaveable dishes in the fridge for a pop and go reheat meal at home or in the office.
These noodles sit easy on the stomach but are filling at the same time. Thick delicious sauce coated noodles that burst with smooth natural flavors and are as versatile as your preferences on any given day. They basically will go well with any kinda of vegetable you got in the house. Watch the video , follow the instructions below to be on your way to yet another eatfoodlicious home cooked featured dish. Feel free to like and share this or anything from my growing catalogue of quick reference recipes with presentation suggestions.
Please follow Facebook, Instagram, Twitter , Pinterest, or subscribe to my YouTube channel.

Heat the pan to medium-high. Add oil then wait until it gets really hot (about 60 seconds). Add minced shallots and cook for 1-2 minutes or until fragrant. Add garlic, green onions & red flakes.

Cook for 30 -45 seconds until fragrant.

Place the noodles in a bowl. Add soy sauce, brown sugar, dark sauce (if using) and rice vinegar. Then mix everything together. Add the sautéd items then mix them in with the noodles. Season with soy sauce or red flakes if needed.

Serve with sliced cucumbers, red chili peppers (Thai pepper) and chili oil.

Mix everything together.
Recent Posts


Be sure to follow me on Facebook, Instagram, Twitter, Pinterest, YouTube or subscribe to the blog for emails and receive free EatFoodlicious recipes daily.
Share on social media

Spicy Udon Noodles
Spicy Udon Noodles are tender and delicious with just the right amount of burn.
Ingredients
- 2 (7 oz each) udon noodles
- 3 garlic cloves minced
- 1 shallot minced
- 4 green onions chopped
Sauce
- 1 tbsp soy sauce
- 1 tbsp red pepper flakes
- 2 tsp brown sugar
- 1 tsp rice vinegar
- 1 tsp dark soy sauce
Instructions
- Boil a pot full of water. Cook the noodles until they loosen. Drain and set aside.
- Heat the pan to medium-high. Add oil then wait until it gets really hot (about 60 seconds). Add minced shallots and cook for 1-2 minutes or until fragrant. Add garlic, green onions, red flakes and cook for 30 -45 seconds until fragrant.
- Place the noodles in a bowl. Add soy sauce, brown sugar, dark sauce (if using) and rice vinegar. Then mix everything together. Add the sautéd items then mix them in with the noodles. Season with soy sauce or red flakes if needed.
- Serve with sliced cucumbers, red chili peppers (Thai pepper) and chili oil. Mix everything together.
Serve & Enjoy!
Video
Tried this recipe?Mention @eatfoodlicious or tag #eatfoodlicious!
Noodle Recipes
Asian Recipes


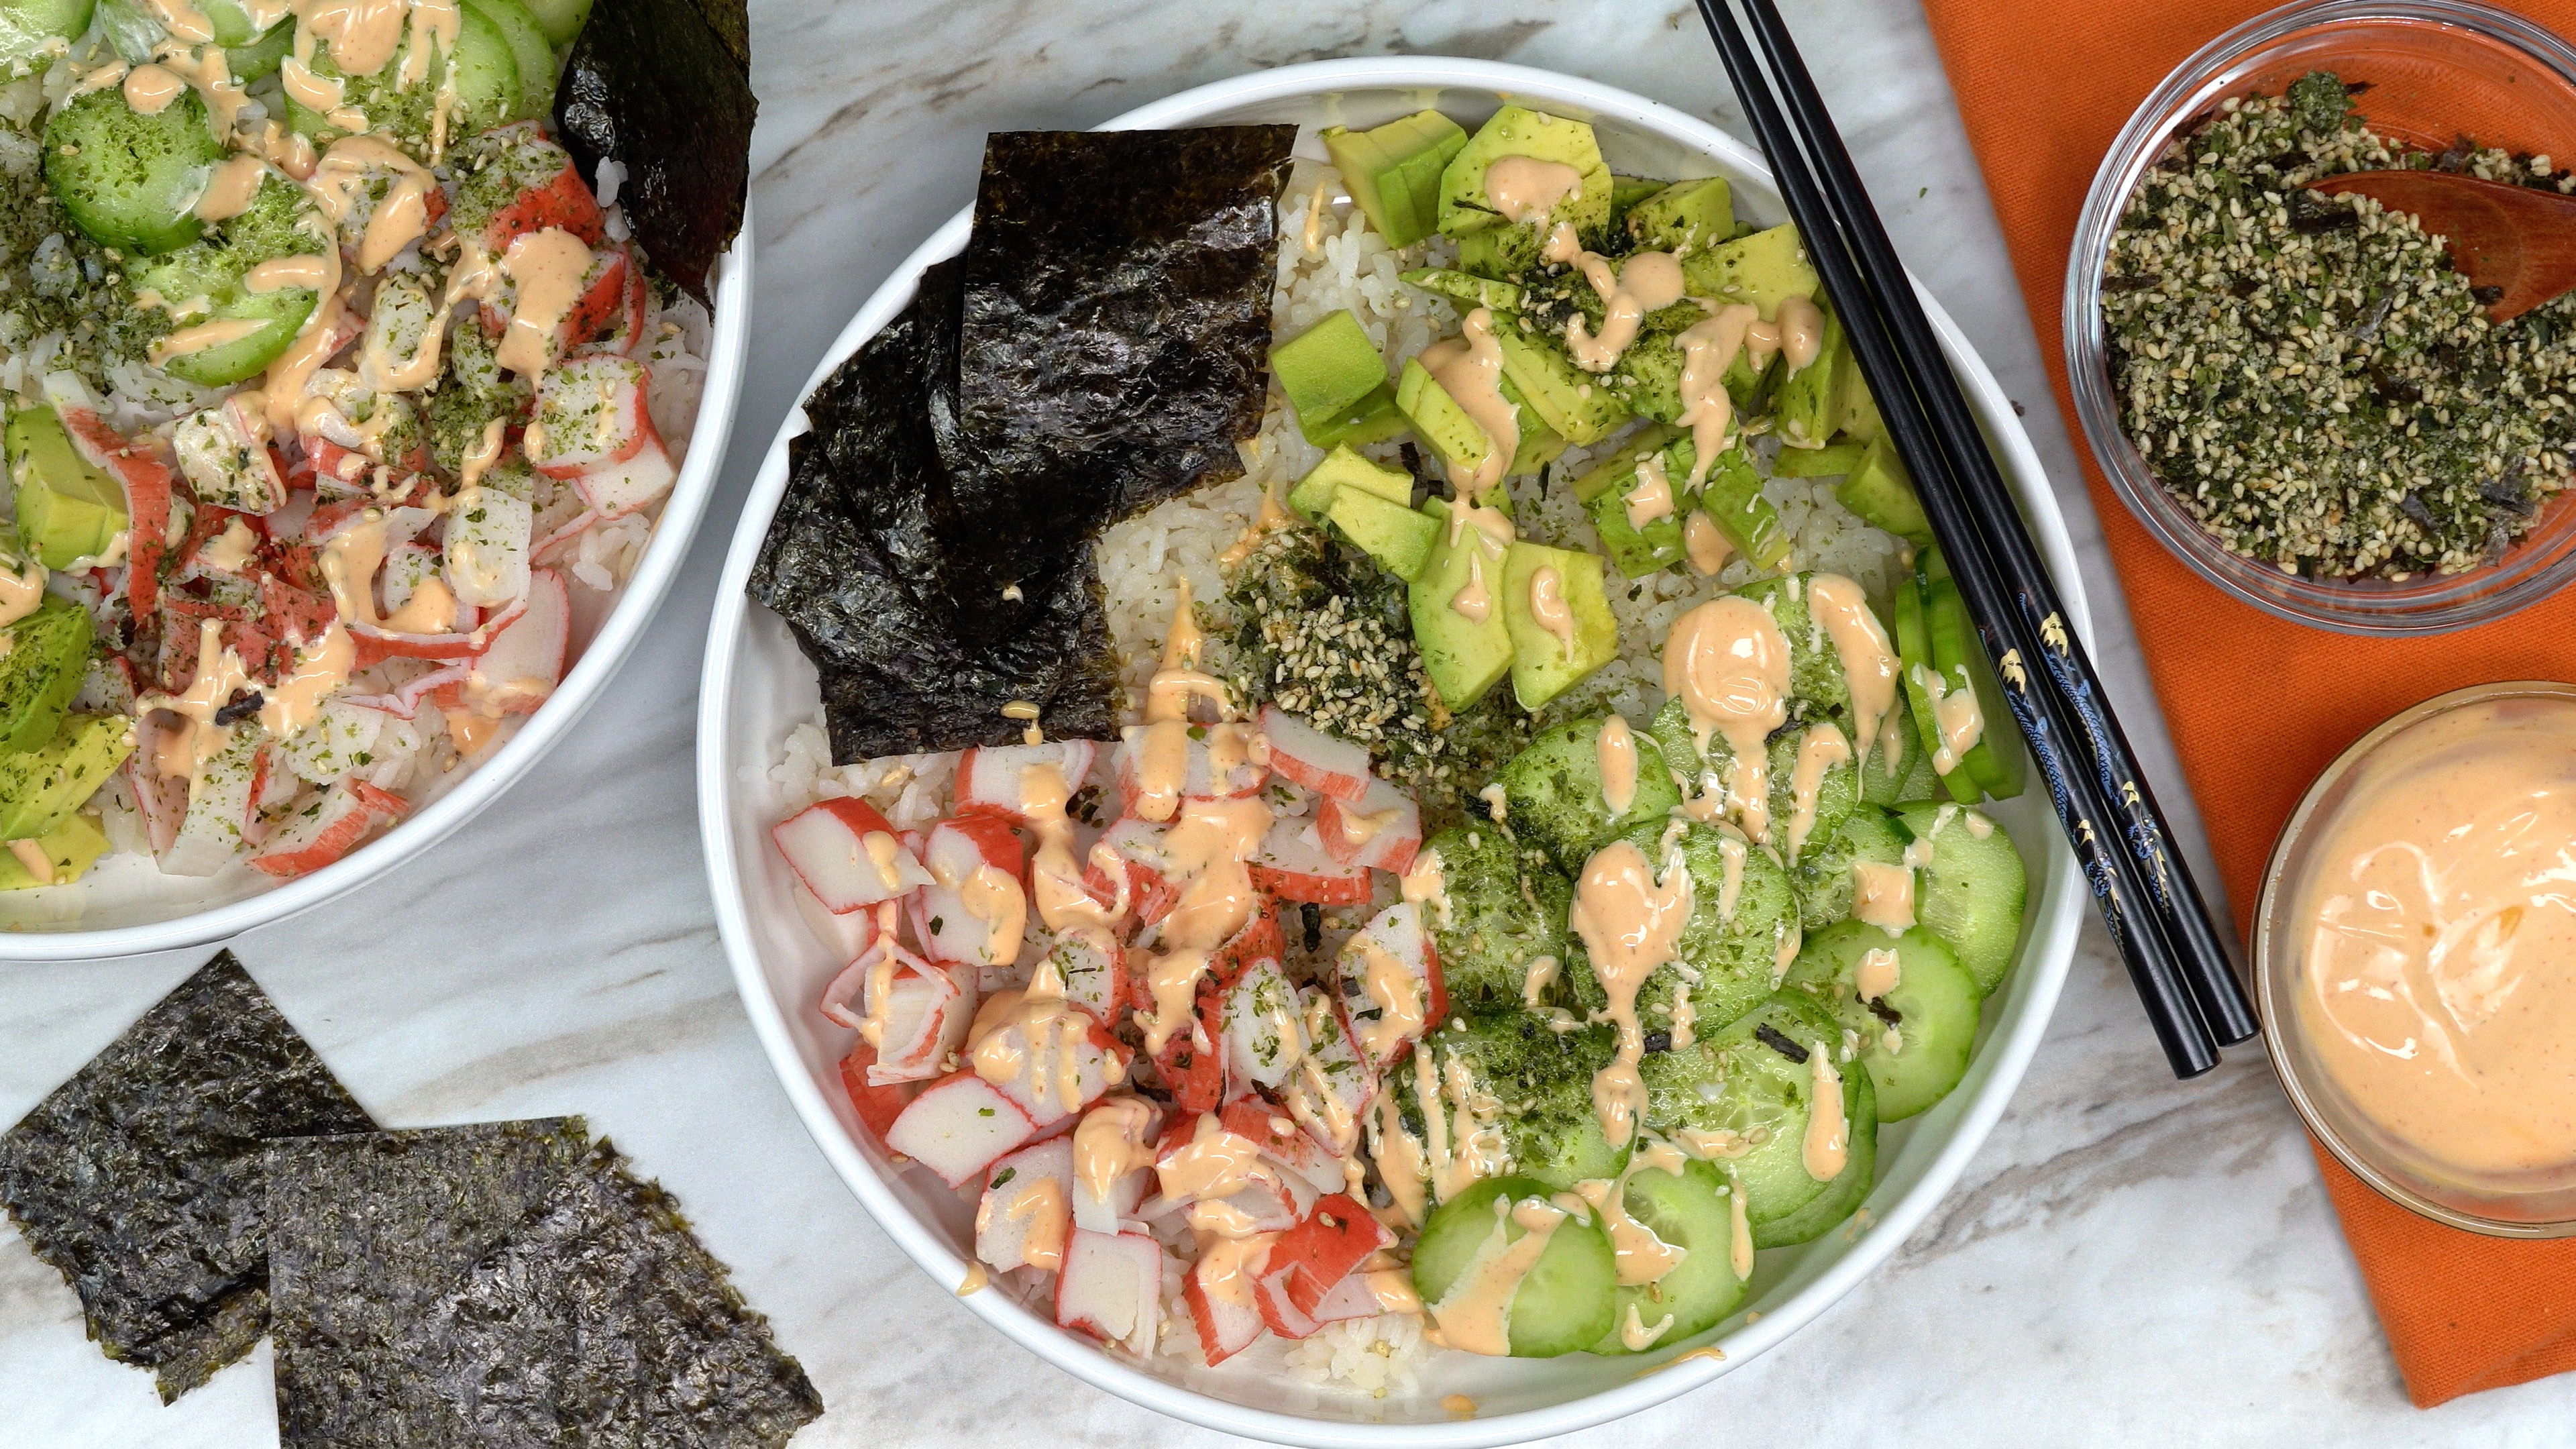
California Roll Bowl
California Roll Bowl is a sushi inspired meal that is quick and easy while being simply delicious. Fresh sushi ingredients layered atop a warm bed of authentic tart rice is very enjoyable to eat. This is perfect as a light lunch or dinner and is gorgeous to serve. We enjoy Sushi and love to take that experience home with this easy to follow recipe. We enjoyed this recipe and recommend you try it at least once to see for yourself how delicious it really is.
Watch the video and follow the instructions below to have a California roll Bowl ready to go anytime. Like and share this or any of my recipes you find interesting from my growing catalogue of menu selections. Don’t forget to hit the subscribe button to stay up to date on all the latest eatfoodlicious publications. Use fresh ingredients for best results. Thanks for visiting and see you again soon.
Please follow Facebook, Instagram, Twitter , Pinterest, or subscribe to my YouTube channel.

Clean and rinse the rice 2-3 times until the water runs clear. Follow the sushi manufacture water ratio (it’s usually on the bag).

Cook the rice in a rice cooker. Add sushi vinegar to the cooked rice and mix.

Sauce ingredients

Mix well.

Rice on the bottom of the bowl.

Add cucumbers

Add imitation crab

Add avocado

Mini seaweed sheets, drizzle the sauce on top.

Furikake (Japanese rice seasoning) and drizzle the sauce on top.
Recent Posts


Be sure to follow me on Facebook, Instagram, Twitter, Pinterest, YouTube or subscribe to the blog for emails and receive free EatFoodlicious recipes daily.
Share on social media

California Roll Bowl
Delightful and delicious this California Roll Bowl is sushi made simple.
Ingredients
- 2 cups sushi rice
- 3 tbsp sushi vinegar
- 2 avocados
- 1 cucumber
- 8 oz imitation crab
- seaweed sheets cut into 2" x 2"
Sauce
- ¼ cup mayonnaise
- 2 tsp Sriracha or any chili oil
- 1 tsp soy sauce
Garnish with
Instructions
- Clean and rinse the rice 2-3 times until the water runs clear. Follow the sushi manufacture water ratio (it's usually on the bag). Cook the rice in a rice cooker.
- Add sushi vinegar to the cooked rice and mix.
- In a small bowl: add mayo, sriracha, soy sauce and mix well. Season with extra sriracha if needed.
- Slice cucumber, avocados and imitation crabs.
- Assemble: rice on the bottom of the bowl. Add cucumbers, avocado, imitation crab, furikake (Japanese rice seasoning), mini seaweed sheets, drizzle the sauce on top.
Serve and enjoy!
Video
Tried this recipe?Mention @eatfoodlicious or tag #eatfoodlicious!
Asian Recipes


Main Dishes


Asian Honey Chicken Breast
Sweet moist tender chicken that is smothered in honey infused sweetness. Healthy, easy to make Asian Honey Chicken Breast is a quick meal for a busy day. These breasts are covered with amazing flavors, they are sweet, tangy, garlicky with a mouthwatering finish. I was inspired to refine this recipe because we live about 3 hours from the closest good Chinese restaurant. I do not have to pay restaurant prices for an easy to make at home meal for half the cost. May family loves this dish and I am sure yours will too.
Asian Honey Chicken Breasts are easily prepared at home. Change up the way you have your Chicken Breast family pack by watching the video and following the instructions below. Feel free to share this or any of my recipes from my growing catalogue of daily suggested meal options. Also hit the like button, leave a comment and let us know how you enjoyed this simple to follow recipe.
Please follow Facebook, Instagram, Twitter , Pinterest, or subscribe to my YouTube channel.

Clean and slice the chicken in half – lengthwise (4 filets). Optional: Use a meat pounder to tenderize the each chicken to an even ⅓” thick.

Season both sides of the breasts with salt & pepper. Place the flour in a shallow bowl. Coat both sides of the chicken with flour.

Then gently shake off the excess.

Heat the pan up to medium-high. Add 2 tbsp butter (wait until it melts). Add chicken breasts and cook for 3-4 minutes per-side or until lightly golden brown. Depending on the size of the pan, you may need to do this is 2 batches. Remove breast and set aside.

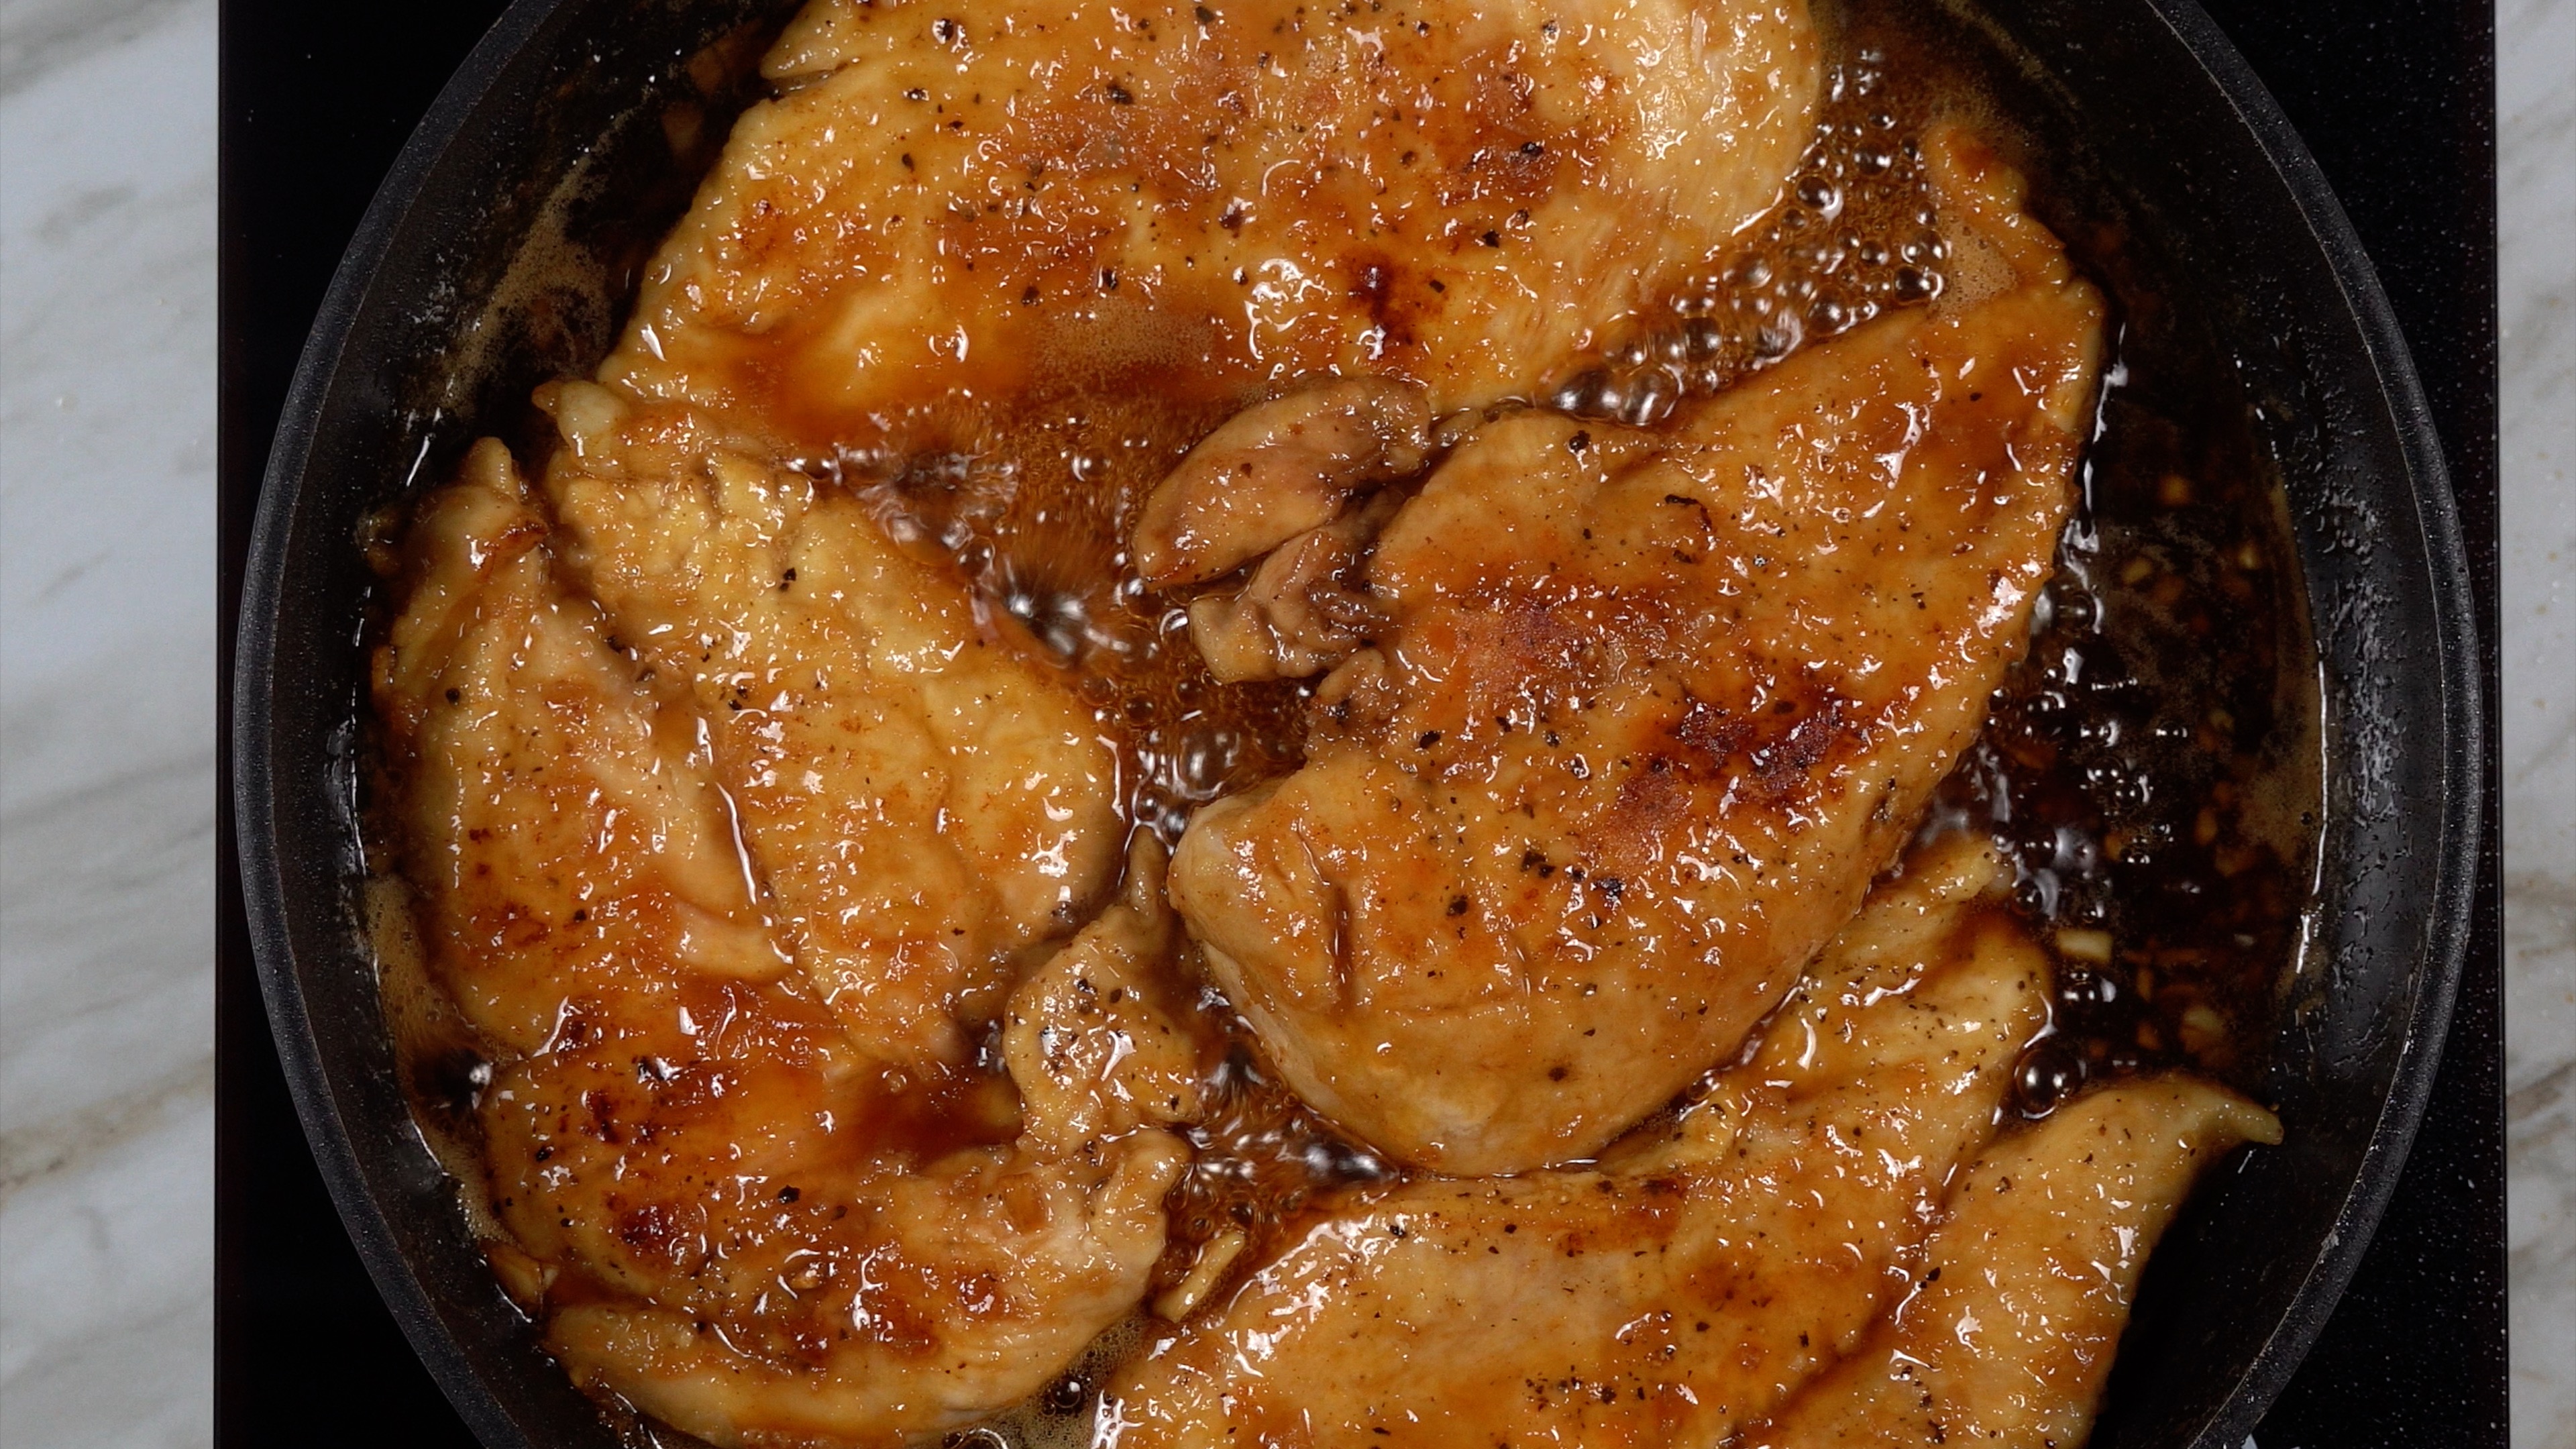
Add butter and wait for 30 seconds. Add garlic, soy sauce, honey, vinegar and mix.

Return chicken to the pan. Cook for 2-3 minutes or until the sauce has reduced by about half.

Flip the chicken every minute or so to get a good coat of sauce.

Serve with rice, noodles or salad.
More Asian Recipes
Recent Posts


Be sure to follow me on Facebook, Instagram, Twitter, Pinterest, YouTube or subscribe to the blog for emails and receive free EatFoodlicious recipes daily.
Share on social media

Asian Honey Chicken Breasts
Sticky sweet and simply delicious.
Ingredients
- 2 boneless skinless chicken breasts
- ½ cup honey
- 2 tbsp soy sauce
- 2 tbsp rice vinegar or white vinegar
- 4 tbsp (divided) unsalted butter or olive oil
- ¼ cup flour
- 3 garlic cloves minced
- salt & pepper
Instructions
- Clean and slice the chicken in half – lengthwise (4 filets). Optional: Use a meat pounder to tenderize the each chicken to an even ⅓" thick.
- Season both sides of the breasts with salt & pepper. Place the flour in a shallow bowl. Coat both sides of the chicken with flour, then gently shake off the excess.
- Heat the pan up to medium-high. Add 2 tbsp butter (wait until it melts). Add chicken breasts and cook for 3-4 minutes per-side or until lightly golden brown. Depending on the size of the pan, you may need to do this is 2 batches. Remove breast and set aside.
- Add butter and wait for 30 seconds. Add garlic, soy sauce, honey, vinegar and mix. Return chicken to the pan. Cook for 2-3 minutes or until the sauce has reduced by about half. Flip the chicken every minute or so to get a good coat of sauce.
Serve with rice, noodles or salad.
Video
Tried this recipe?Mention @eatfoodlicious or tag #eatfoodlicious!
More Chicken Recipes


Garlic Egg Fried Rice (10 minutes)
Garlic Egg fried rice is a comforting way to satisfy your hunger. Top with your favorite chili spice and enjoy a bowl full of satisfaction. The fried rice recipe is great as a main entree and perfect for a small side dish. When you find your self hungry and want to devour something delicious, I suggest giving this recipe a try.
This is a kid favorite in my house and can be on your table shortly after watching the video and following the instructions below. If you have a family that loves to eat everything on the table I suggest challenging them to finish a large bowl of this delicious Fried Rice. We love Fried Rice and I have developed many different variations over the years that my family truly enjoys. Like and share and return again soon for eatfoodlicious recipes daily.
Please follow Facebook, Instagram, Twitter , Pinterest, or subscribe to my YouTube channel.

In a bowl: add eggs, salt & white pepper. Whisk well.

Add 2 tbsp oil to a wok/pan and heat up to high. Wait for 30 seconds. Pour in beaten eggs and mix or scramble.

Cook for 2-3 minutes or until done. Remove the eggs and set aside.

Add another 1 tbsp oil to the wok/pan. Place the chopped onion, minced garlic and cook for 2-3 minutes or until fragrant.

Add cold cooked rice, soy sauce, oyster sauce, sesame oil, salt and mix well or until well coated with the sauce.

Then return the cooked eggs. Use the spatula to break up the eggs and mix/stir.

Add unsalted butter and mix/ stir until butter has fully melted. Remove from the heat.

Garnish with chopped green onions. Serve hot & enjoy!
More Asian Recipes
Recent Posts


Be sure to follow me on Facebook, Instagram, Twitter, Pinterest, YouTube or subscribe to the blog for emails and receive free EatFoodlicious recipes daily.
Share on social media

Garlic Egg Fried Rice (10 minutes)
Tasty simple fried rice everyone will enjoy.
Ingredients
- 4 cups cold rice at least 1 day old
- 5 garlic cloves minced
- ½ onion chopped
- 2 tbsp sesame oil
- 1 tbsp soy sauce
- 1 tbsp oyster sauce
- ½ tsp salt
- 3 tbsp (divided) vegetable or canola oil
- 2 tbsp unsalted butter
Eggs
- 6 large eggs
- ½ tsp salt
- ½ tsp white pepper
Instructions
Eggs
- In a bowl: add eggs, salt & white pepper. Whisk well.
Cook
- Add 2 tbsp oil to a wok/pan and heat up to high. Wait for 30 seconds. Pour in beaten eggs and mix or scramble. Cook for 2-3 minutes or until done. Remove the eggs and set aside.
- Add another 1 tbsp oil to the wok/pan. Place the chopped onion, minced garlic and cook for 2-3 minutes or until fragrant.
- Add cold cooked rice, soy sauce, oyster sauce, sesame oil, salt and mix well or until well coated with the sauce. Then return the cooked eggs. Use the spatula to break up the eggs and mix/stir. Add unsalted butter and mix/ stir until butter has fully melted. Remove from the heat.
Garnish with chopped green onions. Serve hot & enjoy!
Video
Tried this recipe?Mention @eatfoodlicious or tag #eatfoodlicious!
More Rice Recipes


