


Most Recent Posts

Wonderfully tender Corn on the Cob with Husk is easy and simple to cook. Multi task in style using the air fryer to easily prepare the corn on the cob while you tend to the main entree. Or serve this wonderful combination fresh and hot as a nice side item that partners well with anything. This affordable quick and easy to make selection is perfect on any occasion as a side or nice featured bowl of warm comforting food. This easy to follow method of preparation is beginner friendly.
Simply watch the video and follow the detailed instructions below to add a layer of prestige to the table and get this recipe on a plate near you. Like and share this or any of my recipes you find tasty and let me know how they turned out, feedback is most welcome. Don’t forget to hit the subscribe button to stay up to date on my latest publications. The response I have been receiving inspires me to continue and I appreciate all the nice comments. Thank you for taking time today and I hope your next meal adventure is eatfoodlicious.
Please follow Facebook, Instagram, Twitter , Pinterest, or subscribe to my YouTube channel.

Preheat the air fryer to 400°F (204°C). Place corn in husk in the air fryer basket.

Cook for 15 min. Let cool for 5-10 minutes before moving the husk.

Serve with butter, salt, black pepper or anything you prefer.
Recent Posts
Be sure to follow me on Facebook, Instagram, Twitter, Pinterest, YouTube or subscribe to the blog for emails and receive free EatFoodlicious recipes daily.
Share on social media

Air Fryer Recipes
Side Dishes

Juicy Garlic Butter Shrimp cooked in lemon juice and white wine with a total prep time is less than 15 minutes. Garlic Butter Shrimp provides sweet pleasure with gentle herbal notes at the finish. With a fork in hand featuring a freshly skewered delicious morsel of tender satisfaction, take a bite, and chew your way through this elegant deep flavor profile. Once you are almost finished, tear a piece of warm French bread, and dip it into the to serving platter soaking up the meals featured juices. Take a bite of the toast saturated bread, to experience a flavor and texture shift that will add an extra dimension to the dinning experience. As you chew the bread take a nose full of your favorite dry white wine and sip your palate clear with the comforting and cleansing nature of a dang good wine. Then repeat until you have satisfied your inner hunger.
Meals like this are simple to prepare and exquisite to enjoy. Simply watch the video and follow the instructions below to be on your way to a sophisticated EatFoodlicious adventure. Like and share this or any of my recipes from my growing menu of quality meals. Thanks for visiting and be sure to tell a friend about eatfoodlicious daily.
Please follow Facebook, Instagram, Twitter , Pinterest, or subscribe to my YouTube channel.

Clean, peel, devein the shrimps. Dry with paper towel. In a bowl: add shrimp, salt, pepper and mix.

Heat the pan to medium-high. Add butter and wait for it to melt. Add garlic, shallot and sauté for 30-45 seconds until fragrant. Add white wine and wait for it to simmer.

Add lemon juice, thyme and mix. Let simmer for 2-3 minutes.

Add shrimp and turn down the heat to medium.

Cook each side for 45 seconds.

Add chopped parsley and mix everything together. Turn off the heat. Season the sauce with salt & pepper if needed.

Recent Posts
Be sure to follow me on Facebook, Instagram, Twitter, Pinterest, YouTube or subscribe to the blog for emails and receive free EatFoodlicious recipes daily.
Share on social media

Shrimp Recipes
Low Carb Recipes
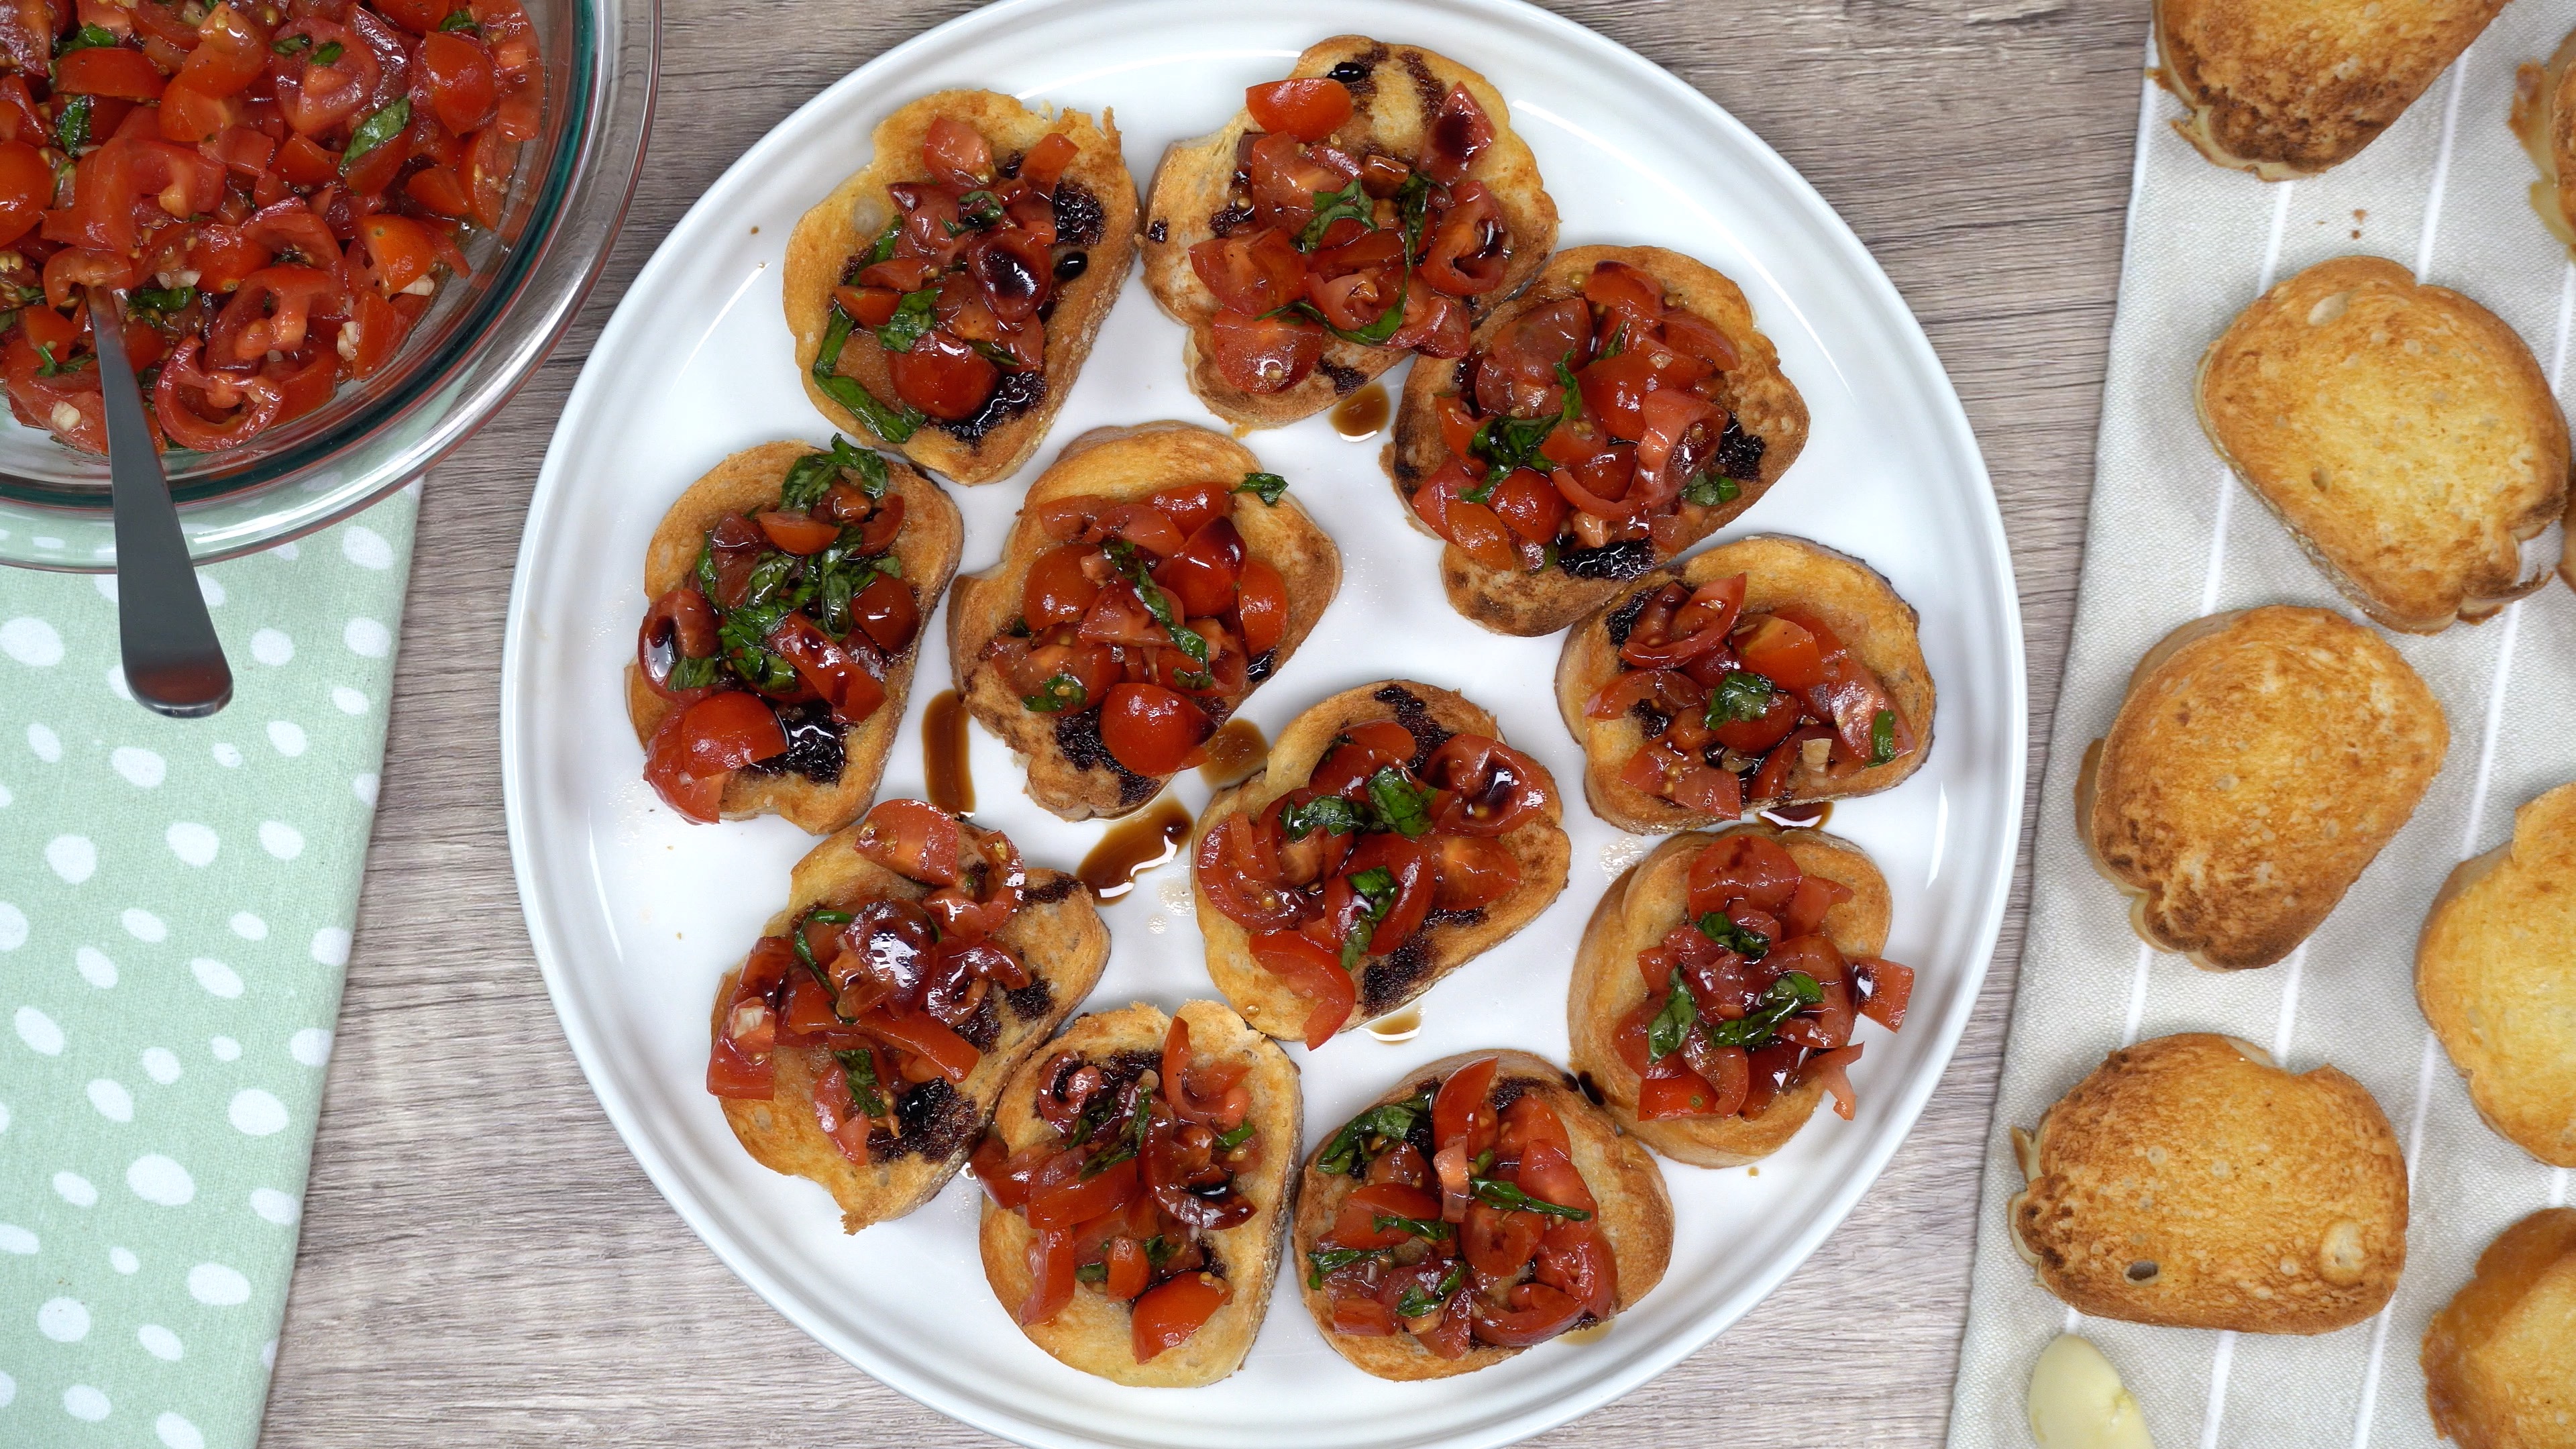
Sweet Cherry Tomato Bruschetta is a delicious appetizer or snack that is so simple to make, anyone can do it. Fresh sliced Cherry tomatoes are very delicious and take the perfect Bruschetta. The freshness and natural flavors burst with juices that make the store bought version seem very generic in comparison. Serve on a nice piece of toasted bread or fresh cracker for a wonderful snack durning a light lunch or as an appetizer with a main entree. Delicious tasty and good to the last bite. This affordable and easy to make selection is perfect for beginners or as a personal treat to enhance a meals presentation. Full of natural flavor and sweetness this is a budget friendly recipe. We enjoy this simple recipe pretty often and recommend you try it at least once to see for yourself how delicious it really is.
Watch the video and follow the instructions below to have Fresh homemade Cherry Tomato Bruschetta bursting with sweet natural juices today. Like and share this or any of my recipes you find interesting from my growing catalogue of menu selections. Don’t forget to hit the subscribe button to stay up to date on all the latest eatfoodlicious publications. The best bread for bruschetta will have a nice firm crust and is sturdy enough to hold the Cherry Tomato Bruschetta topping. My personal favorite is French bread but Italian and Ciabatta are a bit more traditional. Thanks for visiting and see you again soon.
Please follow Facebook, Instagram, Twitter , Pinterest, or subscribe to my YouTube channel.

In a bowl: add chopped cherry tomatoes, chopped basil, minced garlic, olive oil, salt, pepper, balsamic vinegar and mix everything together.

Season with salt & pepper if needed. Cover and refrigerate for at least 30 minutes.

Slice baguette or French bread. Coat both sides with olive oil. Broil in the oven for 1-2 minutes per/side. Let cool for 5 minutes.

Rub garlic clove on the toast. Watch the video for reference.

Drizzle balsamic glaze over bruschetta and toast.

Enjoy!
Recent Posts
Be sure to follow me on Facebook, Instagram, Twitter, Pinterest, YouTube or subscribe to the blog for emails and receive free EatFoodlicious recipes daily.
Share on social media

Appetizer & Snacks
Healthy Recipes
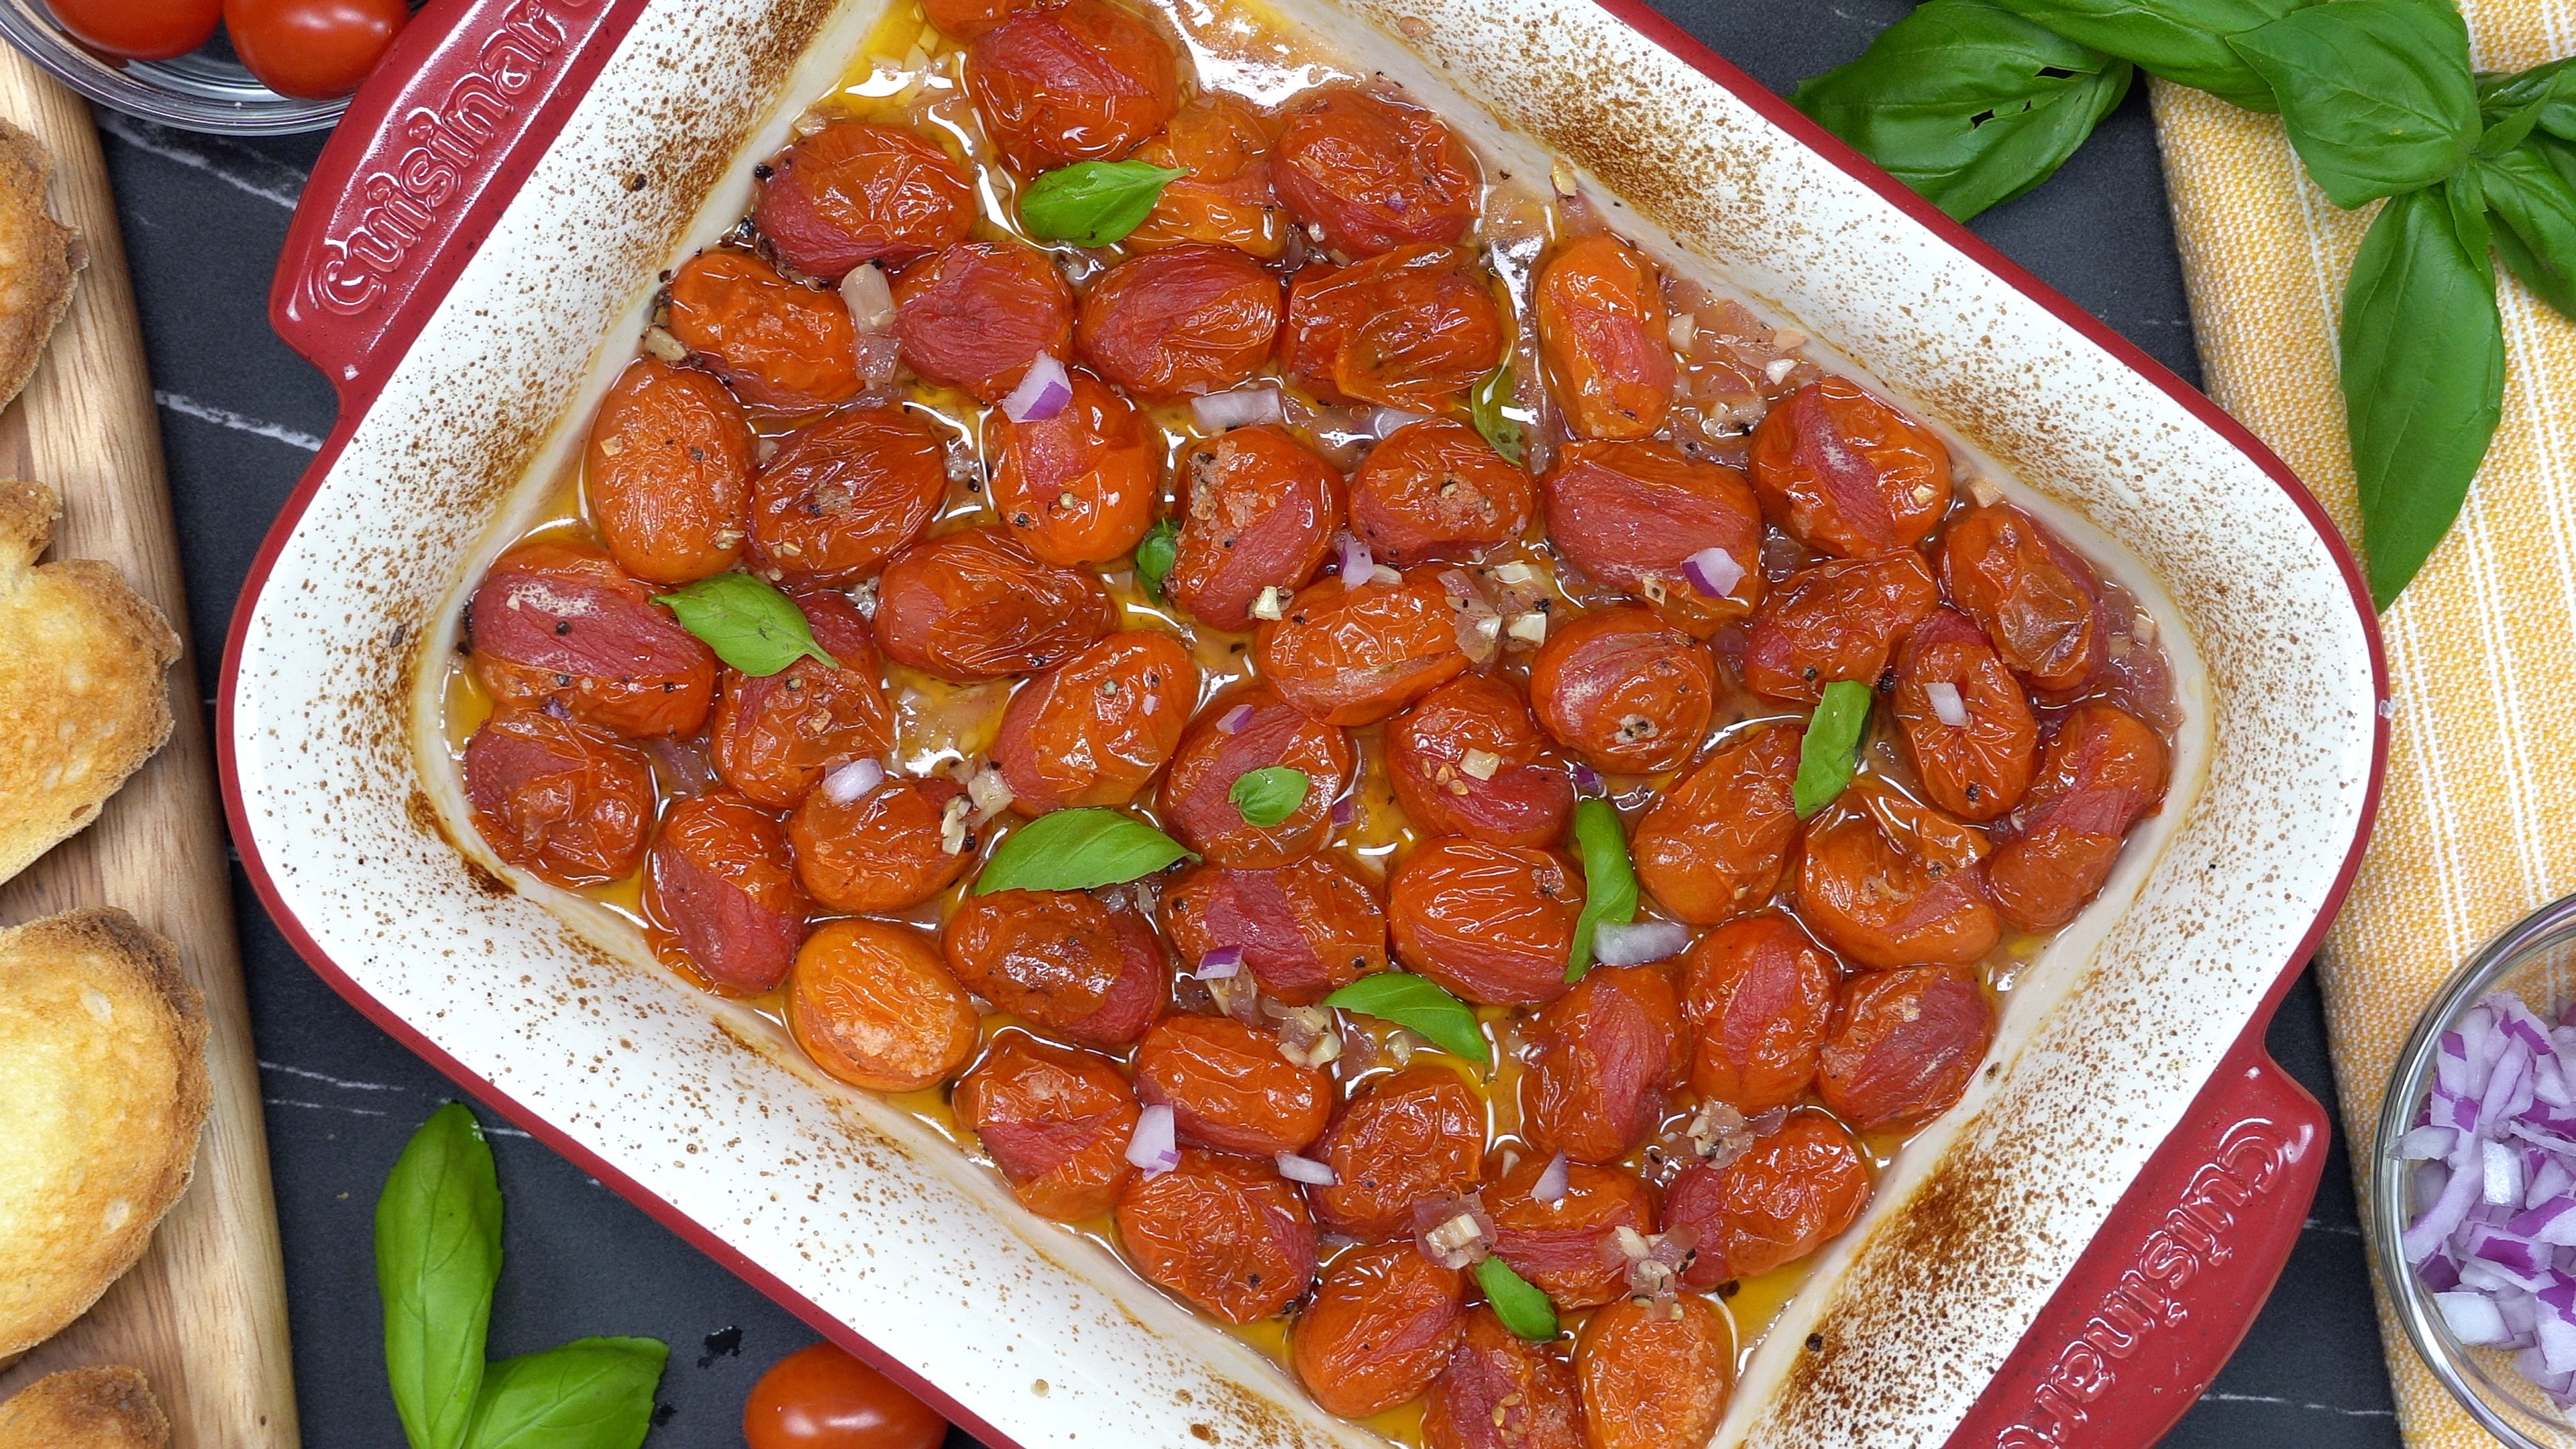
Sweet Roasted Cherry Tomatoes are a delightful treat that every one will enjoy. Fresh Cherry tomatoes roasted until soft and juicy over a nice piece of toasted bread is a wonderful snack durning a light lunch or as an appetizer with a main entree. Delicious tasty and good to the last bite. This affordable and easy to make selection is perfect for beginners or as a personal treat to enhance a meals presentation. Full of natural flavor and sweetness this is a budget friendly recipe. I will sometimes serve this as a side with my morning eggs and dip the toast in the sunny side up yolk. We enjoy this simple recipe pretty often and recommend you try it at least once to see for yourself how delicious it really is.
Watch the video and follow the instructions below to have Roasted Cherry Tomatoes bursting with sweet natural juices today. Like and share this or any of my recipes you find interesting from my growing catalogue of menu selections. Don’t forget to hit the subscribe button to stay up to date on all the latest eatfoodlicious publications. I also love this on as snack in the middle of the day on fresh toasted french bread. Drizzle olive oil over the bread and top with basil for a very simple to make sophisticated looking snack. Thanks for visiting and see you again soon.
Please follow Facebook, Instagram, Twitter , Pinterest, or subscribe to my YouTube channel.

Preheat the oven to 400°F. In a baking dish: add cherry tomatoes, red onions, garlic, salt, pepper & olive oil.

Mix everything together.

Cook for 25-30 minutes or until the tomatoes are soft and beginning to burst.

Optional: slice baguette or French bread. Coat both sides with olive oil. Broil in the oven for 1-2 minutes per/side.

Add roasted tomatoes on the toast. Drizzle with more olive oil. Season with salt & black pepper.

Recent Posts
Be sure to follow me on Facebook, Instagram, Twitter, Pinterest, YouTube or subscribe to the blog for emails and receive free EatFoodlicious recipes daily.
Share on social media

Side Recipes
Healthy Recipes

Sweet Pineapple Jam is an exciting treat that every one willl enjoy. FreshPineapple Jam over a nice piece of toasted bread is a wonderful snack first thing in the morning. Delicious tasty and good to the last bite. This affordable and easy to make selection is perfect for beginners or as a personal treat. Full of natural flavor and sweetness this is a budget friendly recipe. Quick and tasty this recipe will drive everyone in the house to fight over the jam before it is al gone. I enjoyed this recipe and recommend you try it at least once to see for yourself how delicious it really is.
Watch the video and follow the instructions below to have Sweet Pineapple Jam today. Like and share this or any of my recipes you find interesting from my growing catalogue of menu selections. Don’t forget to hit the subscribe button to stay up to date on all the latest eatfoodlicious publications. I love this on as hot biscuit, warm muffin, fresh toast or as a sweet pat to my breakfast plate. Thanks for visiting and see you again soon.
Please follow Facebook, Instagram, Twitter , Pinterest, or subscribe to my YouTube channel.

Peel the pineapple and cut into big cubes. Discard the core.

Place them in a blender and chop until they are crushed.

Optional: grate the pineapple.

Place the crushed or chunks of pineapples with juice in a medium sized pot. Add sugar & water. Stir everything together.

Turn the stove top heat to medium-high. Stirring every few minutes and scoop out the foam. Cook for 3 minutes. Turn down the heat to medium-low. Then simmer for an additional 45 minutes or until most of the juice evaporates. Stir frequently to prevent burning.

The mixture will thicken as the jam reaches room temperature.

Once cool enough to touch; transfer the contents to a jar or container and place in the refrigerator.

Recent Posts
Be sure to follow me on Facebook, Instagram, Twitter, Pinterest, YouTube or subscribe to the blog for emails and receive free EatFoodlicious recipes daily.
Share on social media

Breakfast Recipes
Condiment Recipes

Quick and easy Glazed Carrots are sweet tender and delicious. Caramelized in butter and melted sugar these carrots are colorful, smell great and are pretty darn tasty. Full of flavor, textures and at a budget price, this is recipe is perfect normal meal planning. The glazing is harmonious with the natural sweetness of the Carrot making the simple to prepare treat a delight to enjoy. Also this is a great side item in more ways than one. The prep is so simple and requires very little clean up that you can multitask in your kitchen with confidence. I recommend you try it at least once to see for yourself how delicious it really is.
Watch the video and follow the instructions below to have this tasty side dish today. Like and share this or any of my recipes you find interesting from my growing catalogue of menu selections. Don’t forget to hit the subscribe button to stay up to date on all the latest eatfoodlicious publications. Beautiful color, sweet and slightly crunchy, these Glazed Carrots are the perfect side dish on any occasion. Thanks for visiting and see you again soon.
Please follow Facebook, Instagram, Twitter , Pinterest, or subscribe to my YouTube channel.

In a non-stick pan: add water, butter, brown sugar, and carrots.

Cover with a lid.

Turn up the heat to low and cook for 10 minutes. Open the lid and stir everything gently. Cover with the lid again. Turn up the heat to high and cook for 5 minutes. Remove from heat source and let rest for 10 minutes with lid on.

Enjoy!
Recent Posts
Be sure to follow me on Facebook, Instagram, Twitter, Pinterest, YouTube or subscribe to the blog for emails and receive free EatFoodlicious recipes daily.
Share on social media

Side Dishes
Healthy Dishes
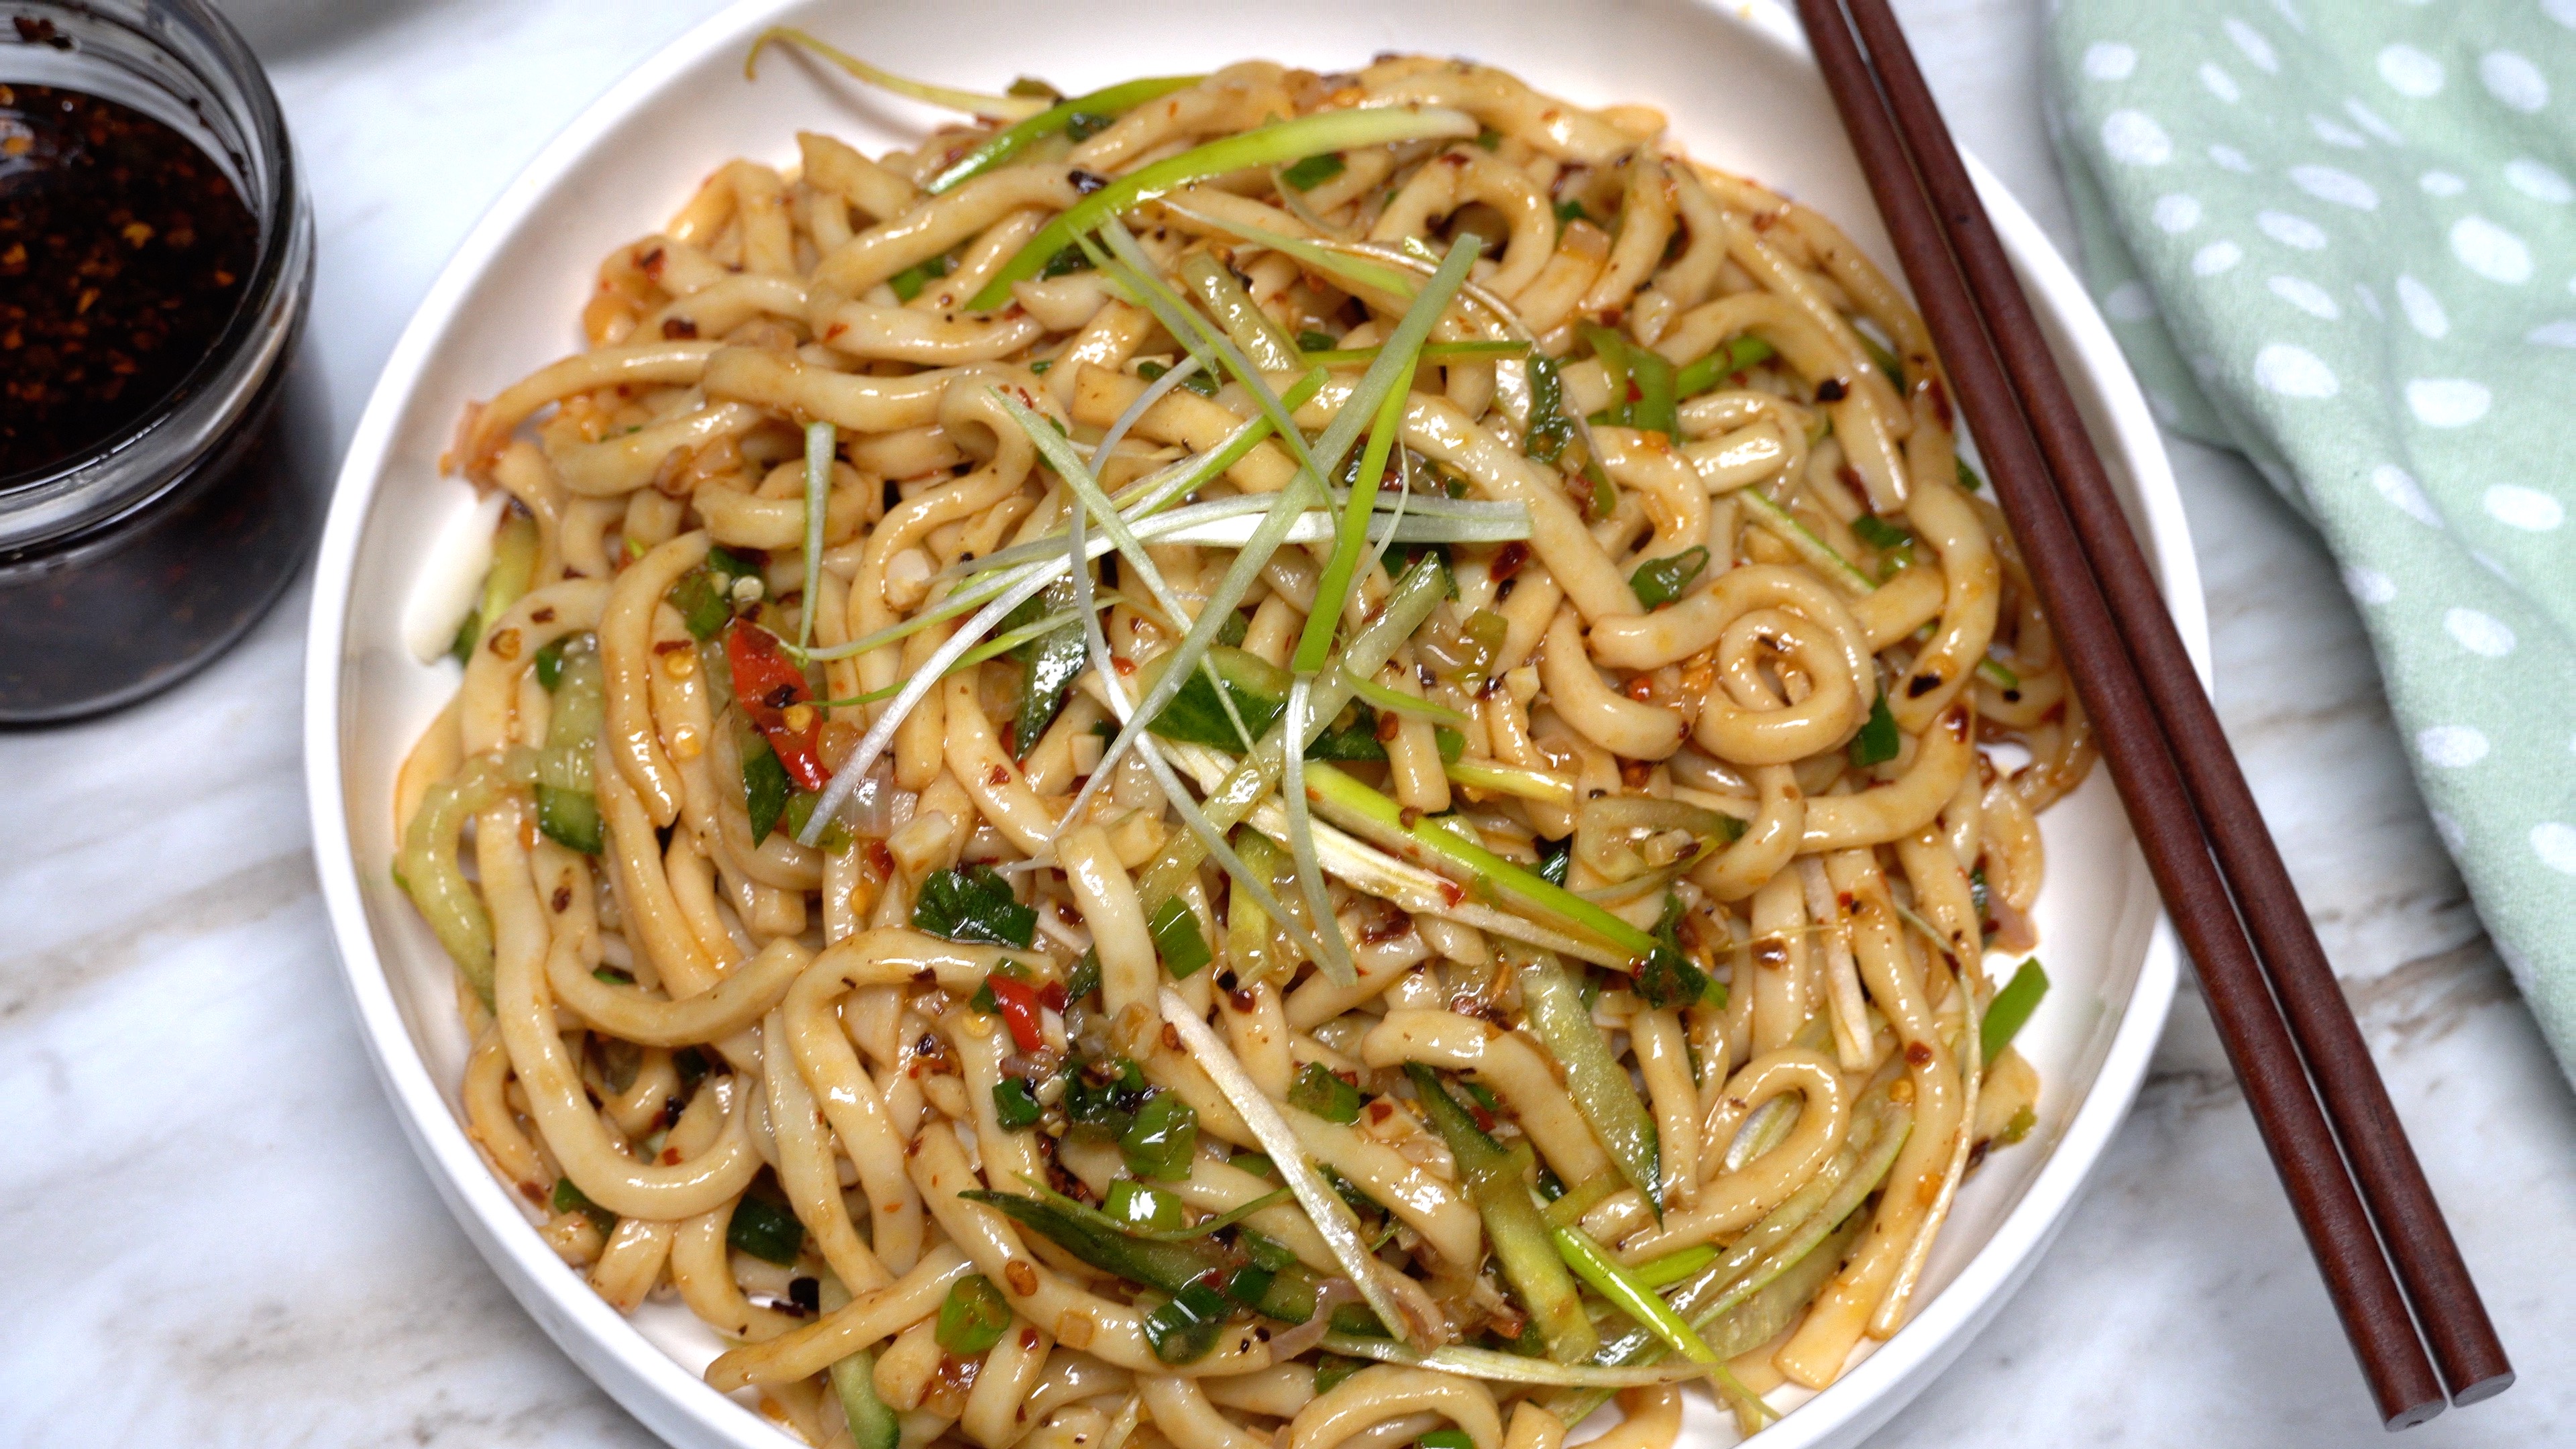
One of my personal favorite things to make for a quick and easy meal is this Udon Noodles recipe. I have eaten these noodles like these for most of my life; being brought up in a home where noodles and rice are a main staple for the table. If you look in my cabinets you will find a box of these noodles from the local grocery. The chew of a Udon Noodle is an elegant experience that heightens the sophistication of a simple work with what you got meal. I generally have the majority of these ingredients on hand or only need to grab one or two things at the store to complete the meal. I keep some Thai peppers in the refrigerator to nibble on while I work my way through a heaping serving. This is also simple to warm up later and keeps great under refrigeration. A couple of microwaveable dishes in the fridge for a pop and go reheat meal at home or in the office.
These noodles sit easy on the stomach but are filling at the same time. Thick delicious sauce coated noodles that burst with smooth natural flavors and are as versatile as your preferences on any given day. They basically will go well with any kinda of vegetable you got in the house. Watch the video , follow the instructions below to be on your way to yet another eatfoodlicious home cooked featured dish. Feel free to like and share this or anything from my growing catalogue of quick reference recipes with presentation suggestions.
Please follow Facebook, Instagram, Twitter , Pinterest, or subscribe to my YouTube channel.

Heat the pan to medium-high. Add oil then wait until it gets really hot (about 60 seconds). Add minced shallots and cook for 1-2 minutes or until fragrant. Add garlic, green onions & red flakes.

Cook for 30 -45 seconds until fragrant.

Place the noodles in a bowl. Add soy sauce, brown sugar, dark sauce (if using) and rice vinegar. Then mix everything together. Add the sautéd items then mix them in with the noodles. Season with soy sauce or red flakes if needed.

Serve with sliced cucumbers, red chili peppers (Thai pepper) and chili oil.

Mix everything together.
Recent Posts
Be sure to follow me on Facebook, Instagram, Twitter, Pinterest, YouTube or subscribe to the blog for emails and receive free EatFoodlicious recipes daily.
Share on social media

Noodle Recipes
Asian Recipes

Juicy Garlic Butter Mushrooms are the perfect side dish. Delicious tasty and good to the last bite. This affordable and easy to make selection is perfect on any occasion. Full of flavor, textures and at a budget price, this is perfect normal meal planning. Quick and tasty this recipe will drive everyone in the house to the table at neck break speed. I enjoyed this recipe and recommend you try it at least once to see for yourself how delicious it really is.
Watch the video and follow the instructions below to have this dish today. Like and share this or any of my recipes you find interesting from my growing catalogue of menu selections. Don’t forget to hit the subscribe button to stay up to date on all the latest eatfoodlicious publications. Thanks for visiting and see you again soon.
Please follow Facebook, Instagram, Twitter , Pinterest, or subscribe to my YouTube channel.

In bowl: add whole mushrooms, melted butter, garlic, olive oil, salt, pepper and mix.

Transfer the mushrooms to a baking sheet.

Bake for 20 -25 minutes.

Serve.

Enjoy!
Recent Posts
Be sure to follow me on Facebook, Instagram, Twitter, Pinterest, YouTube or subscribe to the blog for emails and receive free EatFoodlicious recipes daily.
Share on social media

Side Dish Recipes
Appetizer & Snack Recipes
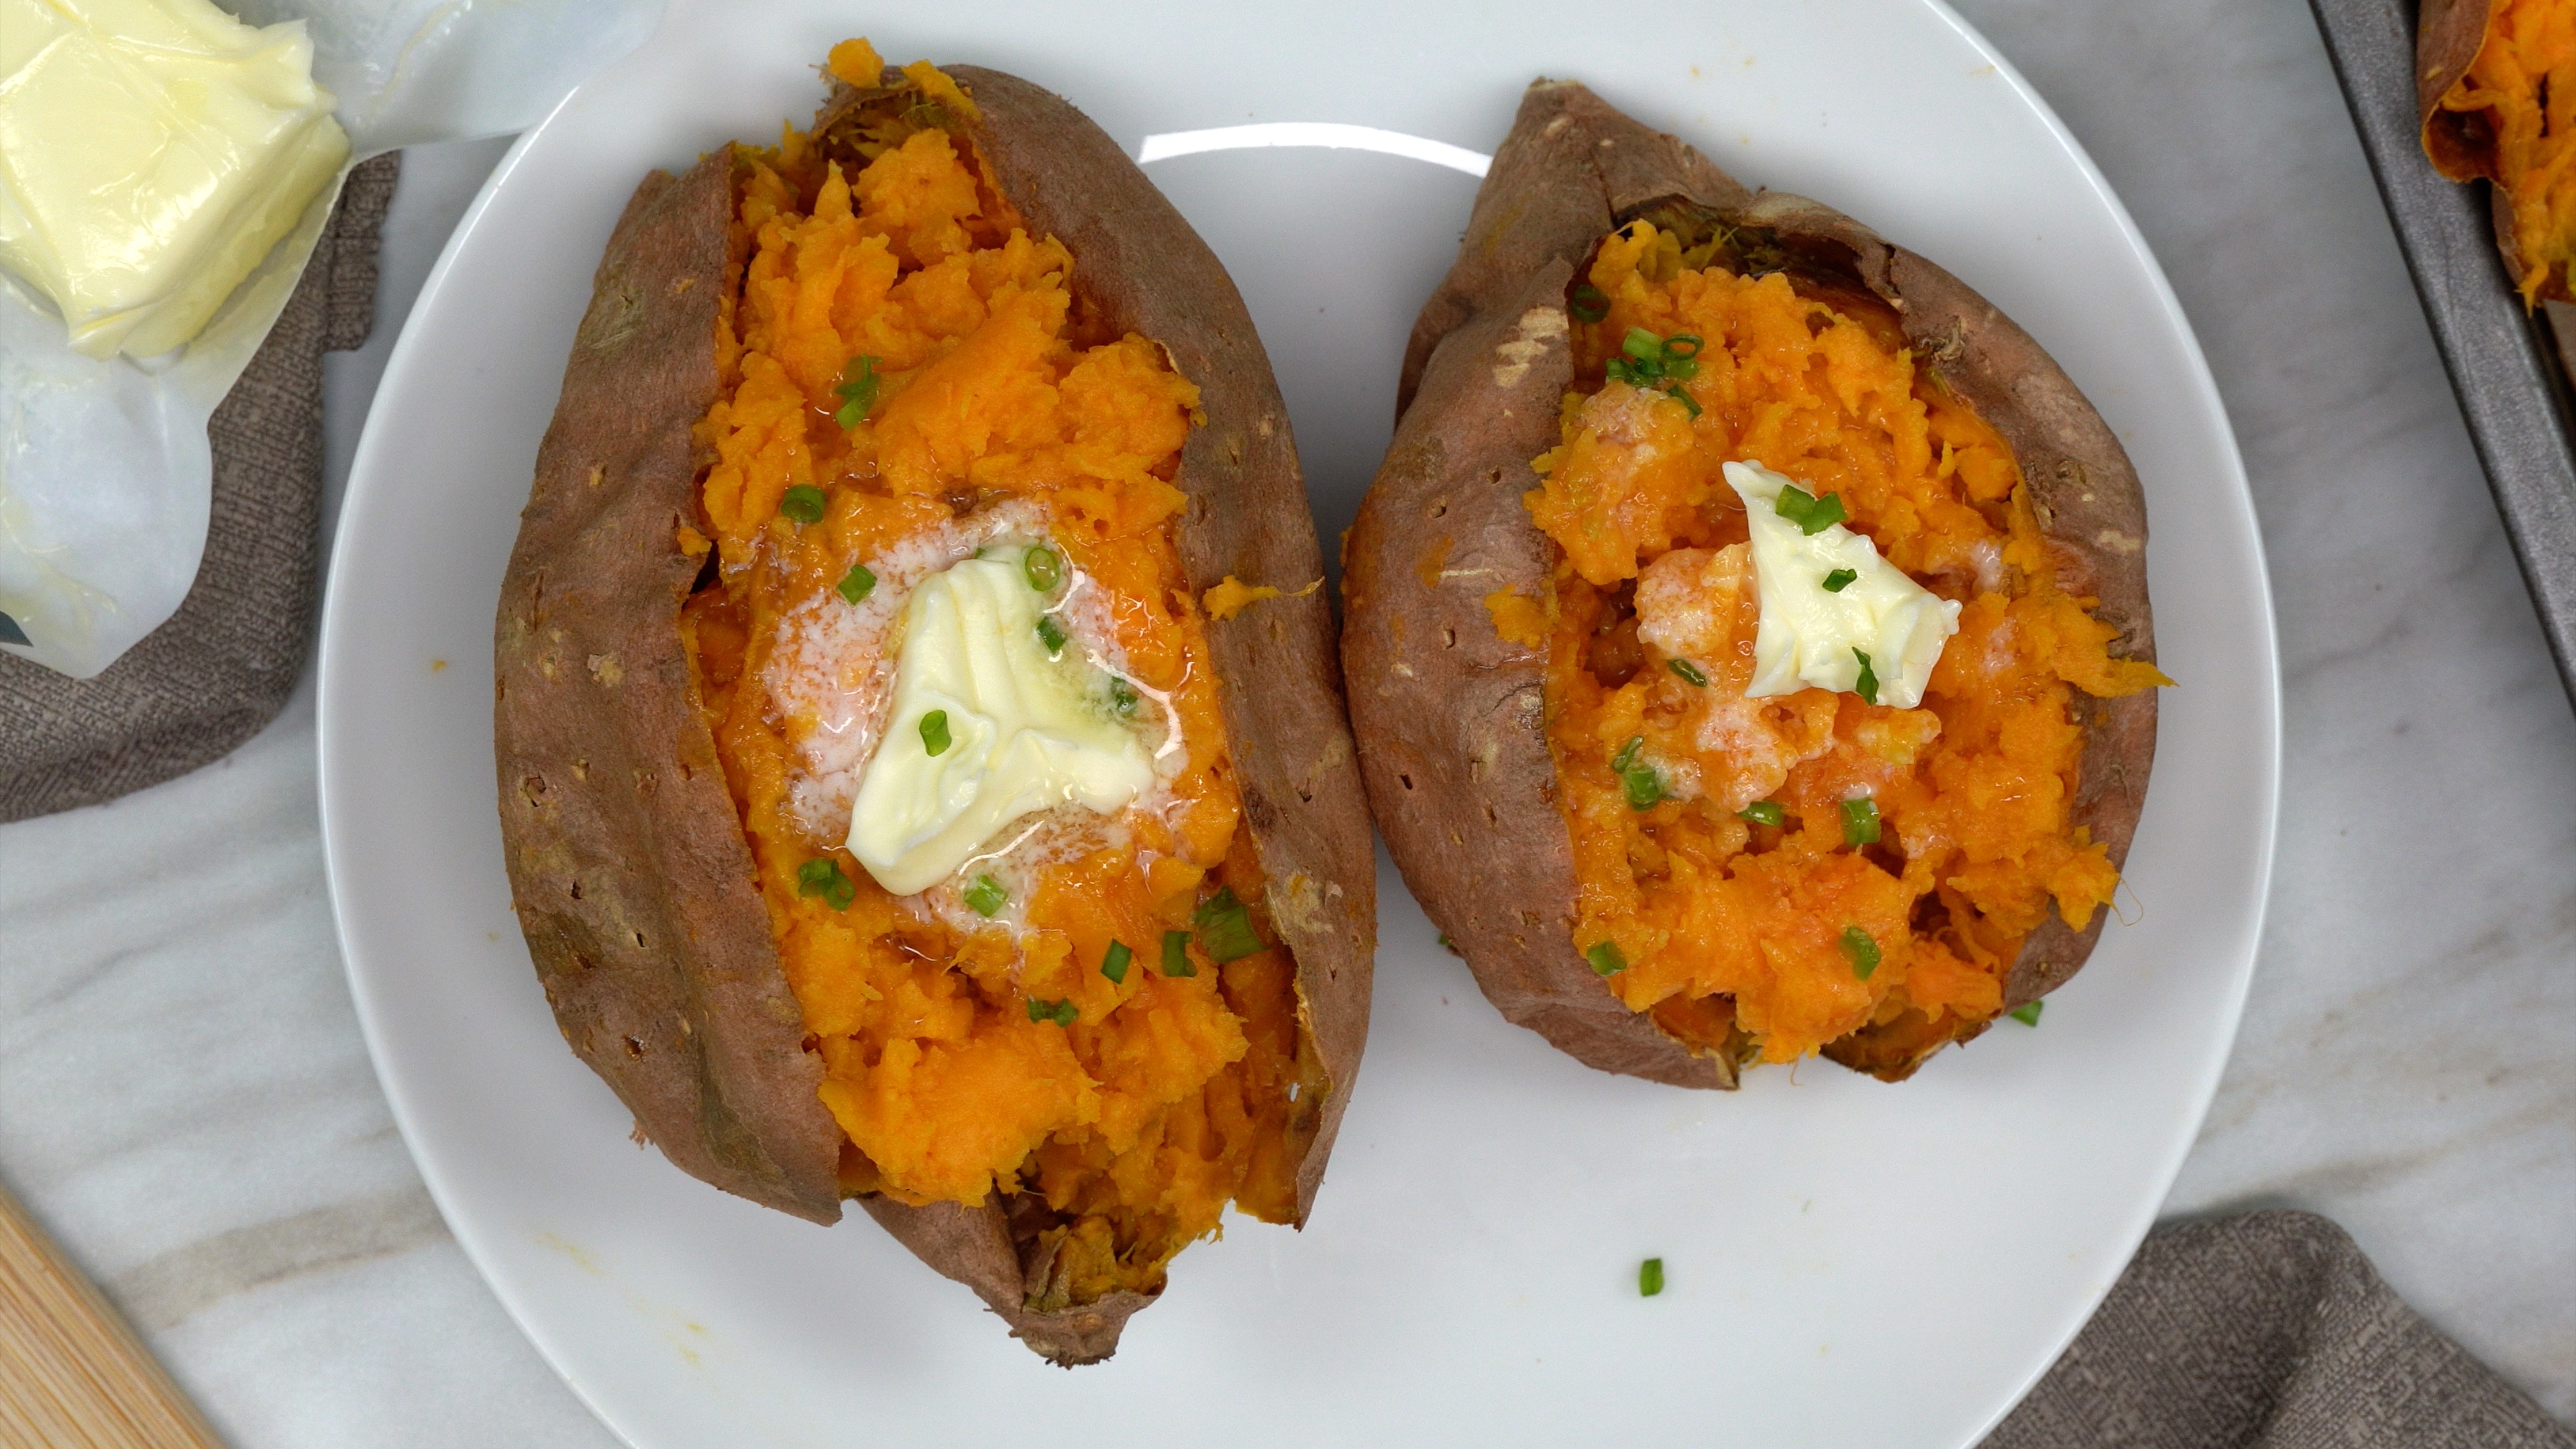
Baked Sweet Potatoes are perfect as a side or standalone snack. Sweet Potatoes are one of natures filling sweet and delicious rewards that require very little influence from seasoning to be very tasty. Make several of these ahead of time and reheat later for equal results. Serve warm to hot with a nice pat of butter to bring the richness of the natural sweetness to a comforting satisfaction. This is a simple to follow recipe that is perfect for beginners that are learning their way around the kitchen.
Watch the video and follow the instructions below to have Baked Sweet Potatoes ready to go today. Like and share this or any of my recipes you find interesting from my growing catalogue of menu selections. Don’t forget to hit the subscribe button to stay up to date on all the latest eatfoodlicious publications. Affordable and filing Baked Sweet Potatoes go great with any entree to complete any meal/ Thanks for visiting and see you again soon.
Please follow Facebook, Instagram, Twitter , Pinterest, or subscribe to my YouTube channel.

Clean and scrub the potatoes until all dirt has been removed. Pat dry with a paper towel. Sweet potato prep: Use a fork to pierce them thoroughly. Place on a baking sheet.

Bake for 40 – 45 minutes.

Until soft & tender. Slice and serve with butter, salt & pepper. Enjoy!
Recent Posts
Be sure to follow me on Facebook, Instagram, Twitter, Pinterest, YouTube or subscribe to the blog for emails and receive free EatFoodlicious recipes daily.
Share on social media

Side Dish Recipes
Appetizer & Snack Recipes

Greek salad is a personal favorite, so I am constantly looking for ways to tweak it or change it up a bit. I really enjoy Horiatiki style as it comes with gorgeous hunks of smooth cheese and my favorite cucumbers. This is a crunchy salad that is full of flavor that I believe you could proudly enjoy standalone or with a main entree like shawarma. I enjoyed this recipe and recommend you try it at least once to see for yourself how delicious it really is.
Watch the video and follow the instructions below to have this mouthwatering zesty Horiatiki Greek Salad today. Like and share this or any of my recipes you find interesting from my growing catalogue of menu selections. Don’t forget to hit the subscribe button to stay up to date on all the latest eatfoodlicious publications. Perfect choice for conversational dinning for any special occasions where a touch of style and flavor can enhance your eatfoodlicious experience. Thanks for visiting and see you again soon.
Please follow Facebook, Instagram, Twitter , Pinterest, or subscribe to my YouTube channel.

Thinly slice the red onion. Place onion slices in ice water with 1 tsp of white vinegar.

Slice the cucumber; Optional: remove the cucumber’s skin.

Remove the core and seeds from the bell pepper then slice thinly.

Cut the tomatoes into wedges.

In a large bowl: Place the sliced cucumbers, tomatoes wedges, sliced bell peppers, sliced purple onion (make sure to squeeze out the excess liquid).

Greek pitted kalamata, extra virgin olive oil & red wine vinegar.

Oregano, salt and black pepper.

Then gently toss the salad together.

Transfer the vegetables to a serving platter.

Place the Greek Feta Cheese Block in the center.

Garnish w/ salt, pepper, oregano, and olive oil.

Or break the feta block into big chunks.

Serve with bread.

Serve

Enjoy!
Recent Posts
Be sure to follow me on Facebook, Instagram, Twitter, Pinterest, YouTube or subscribe to the blog for emails and receive free EatFoodlicious recipes daily.
Share on social media

Greek Recipes
Healthy Recipes


